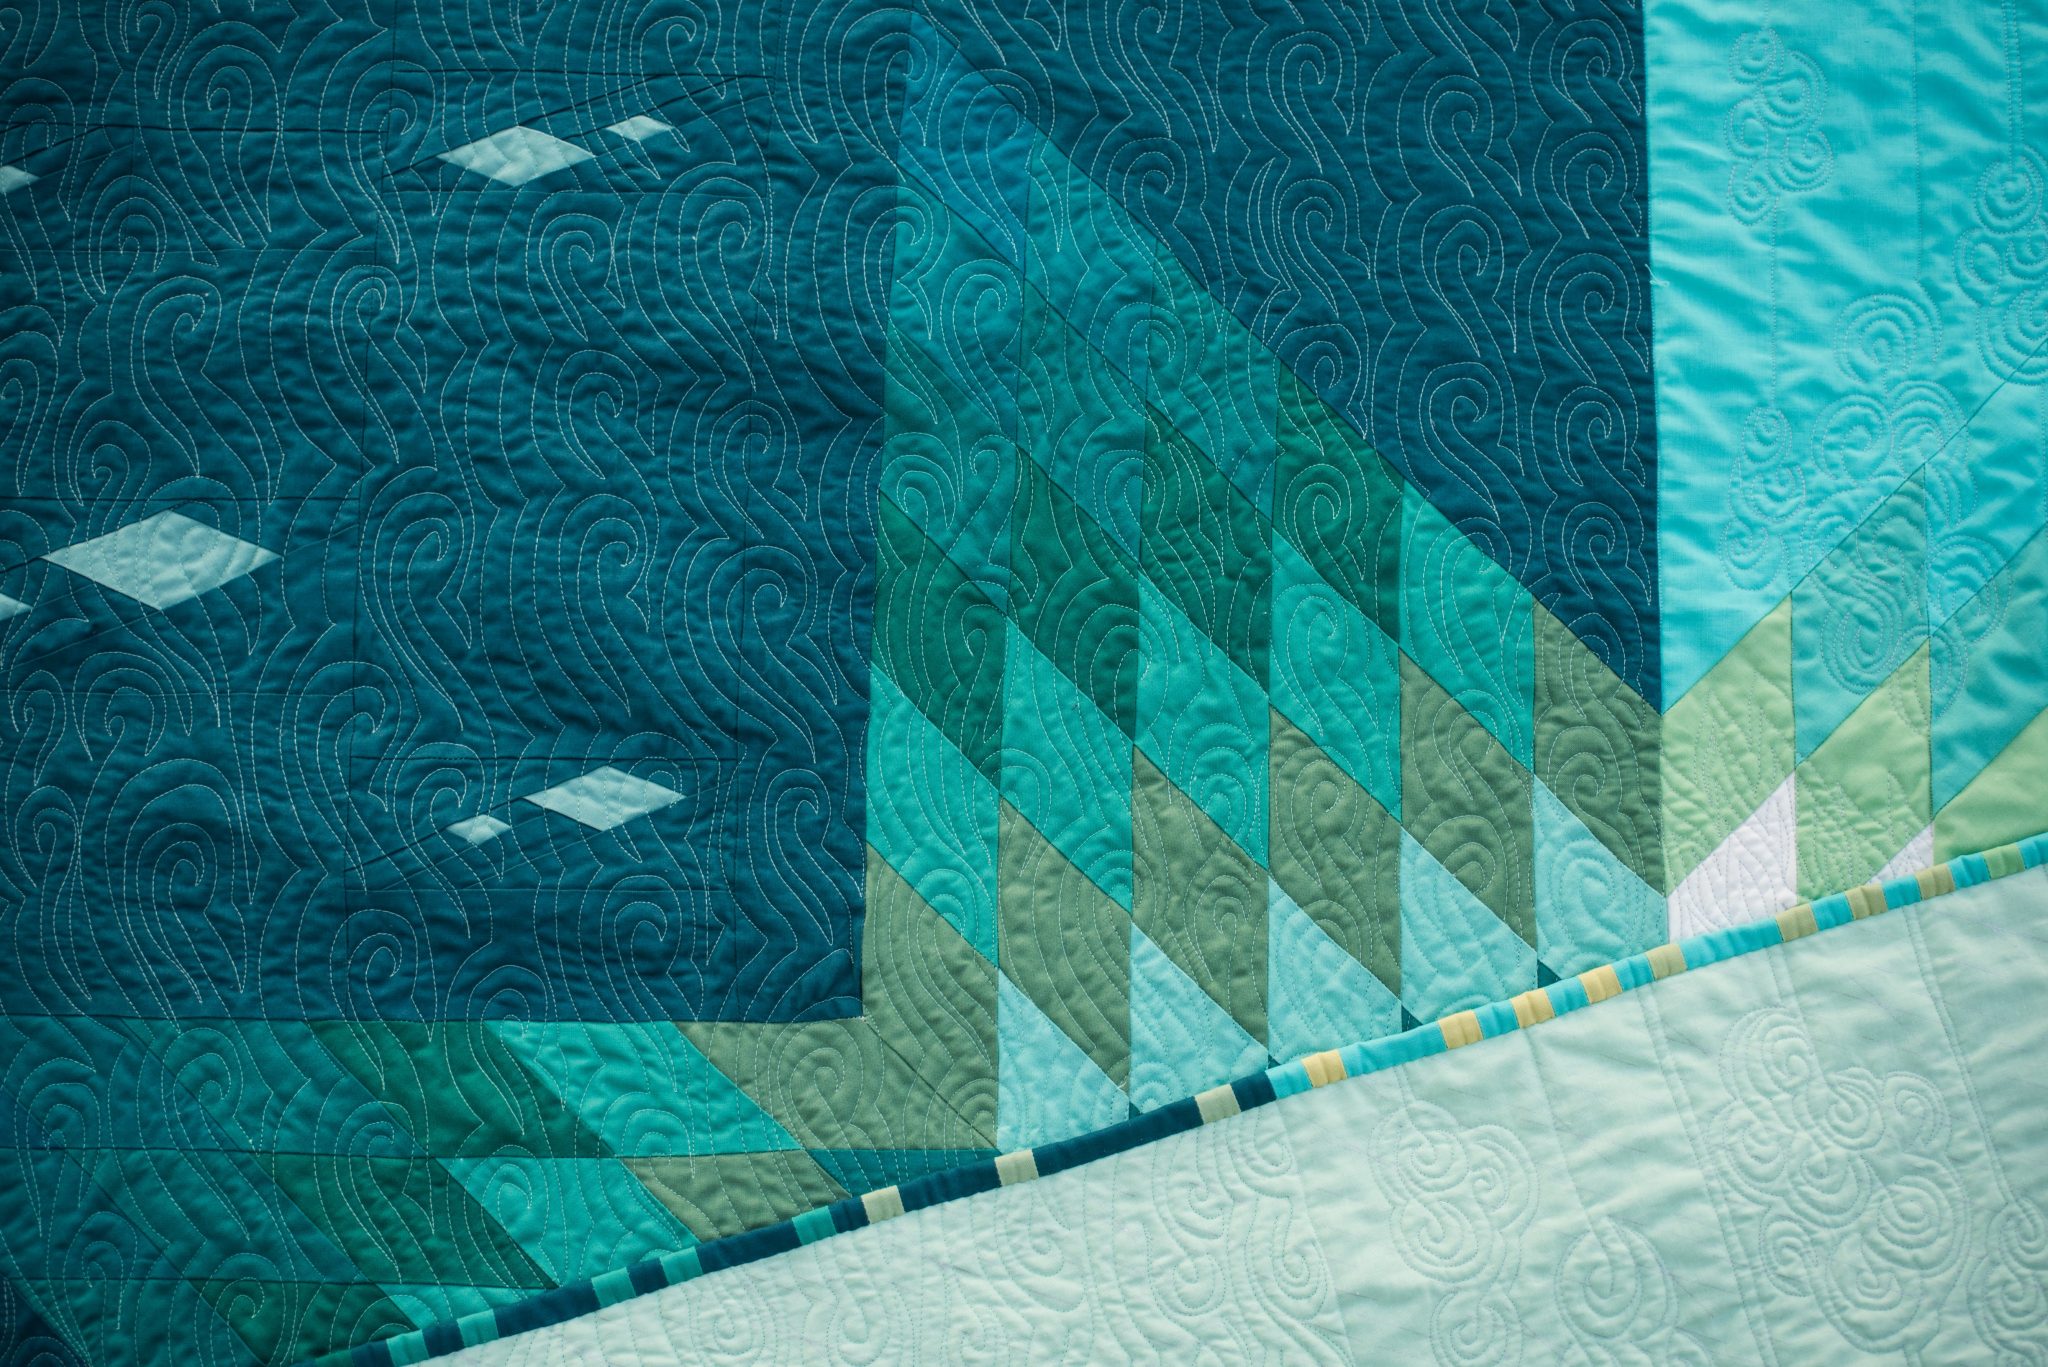
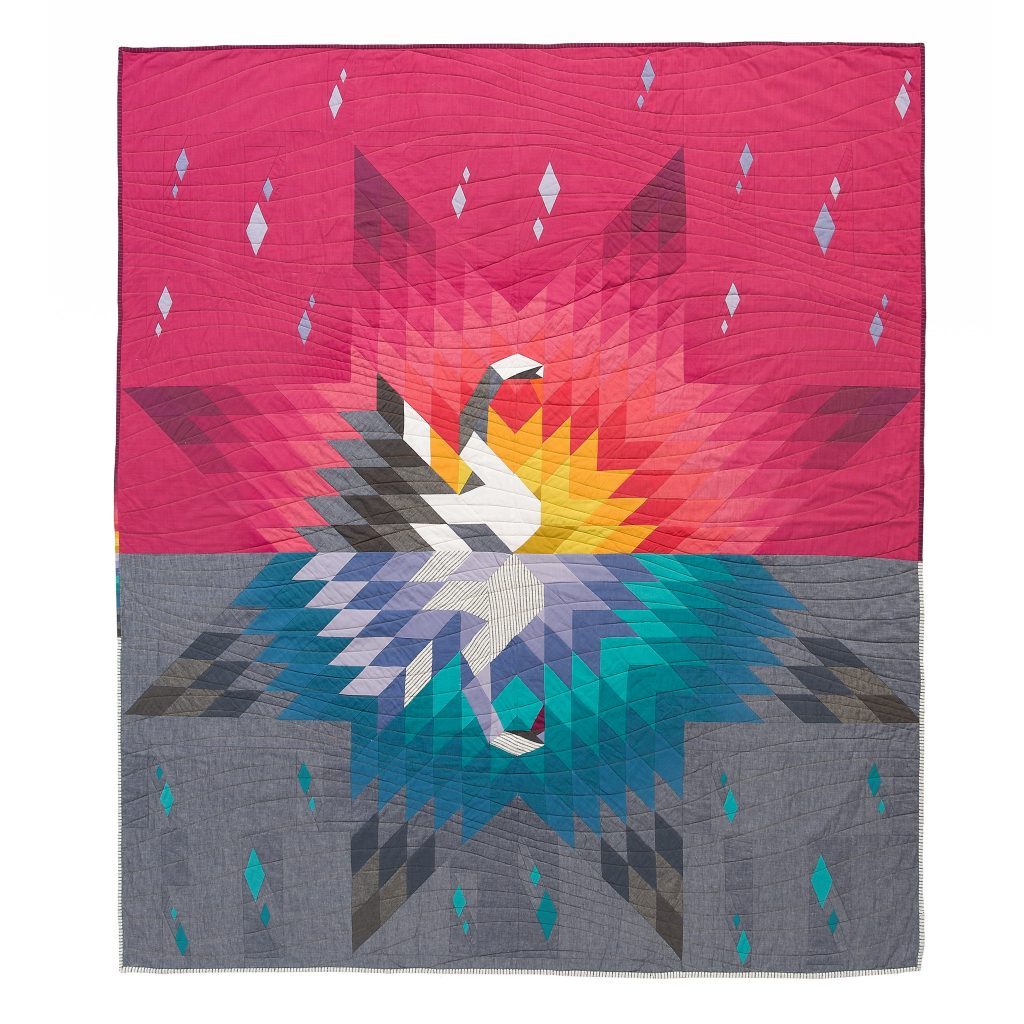
The traditional lone star quilt is the base for Our Song, Your Reflection. This beautiful classic design uses strip sets cut on the diagonal to create a large-scale pattern. Here are some tips to make this a successful endeavour! First things first: Don’t be scared. Once you get going, it’s a ton of fun with very rewarding results.
Choosing fabrics: If this is your first time making a Lone Star, pick fabrics that blend into each other well. That means a gradient, or really busy prints in the same colour family. If your points don’t match perfectly, they’re less noticeable. High contrast fabrics are less forgiving.

Tip #1: Hands off. Be as gentle as possible with your fabric. This goes for general handling and when you’re guiding the fabric through the machine. Don’t pull on it.
Tip #2: Starch or pressing spray. The Lone Star is based on 45 degree angles, which means that you are cutting fabric diagonally across the warp or weft (straight grain) of the fabric. These are bias edges and can be stretchy and unwieldy. When you are sewing your strips sets together, use your favourite starch or pressing spray to keep your fabric behaving before you starting diagonal cuts. As you continue along, you can continue to starch/spray when you’re pressing but the first time is the most important!
Tip #3: Pressing direction. People ask me which way I press — and I say, I don’t worry about it when it comes to Lone Star construction. My reasoning is that the seams meet at a 45 degree angle and are never going to be outright stacked. The seam is going to be “spread” along a distance of the seam and are not terribly bulky (see Tip #5 for a visual of how the seams meet). If you want to be fastidious about it, you can alternate pressing directions when you are assembling your strip sets.
Tip #4: Checking your 45 degree angle. As you cut your strips from your assembled set, your 45 degree angle may start to stray from a true 45 degree. Check you 45 degree along a few “interior” seams to avoid your angle from “creeping”. If it’s starting to creep, trim off a bit to make it true again.


Tip #4: Diamond piecing. If you are sewing two diamond shapes together, mark a 1/4″ seam allowance on the back of one to get them to line up properly. Finger press the seam before pressing gently with an iron. Using a 1/4″ seam guide helps here.

Tip #5: Matching points. When it comes time to join two diamond strips together, mark a 1/4″ seam allowance on the back of one strip. I mark at the intersections only.


Align your strips, right sides together. When you fold back one layer right on that 1/4″ line, your to seams should make a nice diagonal like this:


Want to see that again? Here:

Pin them in place and sew.


See? Lone Stars are so worth the effort. Go for it and don’t look back!

Your tutorials are fantastic. I always learn so much from you Angela!
Cheers from Mexico
I’m so glad, Alejandra! Thanks for reading. 🙂
Thank you for valuable tips
Thank you for all. The tips & tricks ! Ibe wanted to do a lone star or I should say try it again after 25+ years. The last time I made this pattern it was my 2nd quilt and the center of the star puffed out like a mushroom growing in the center of the star!
Needless to say this is my nightmare pattern😁
It certainly can be tricky. My first one had a bit of a puff in the middle but I “quilted it out”!
Thank you for this. Very helpful.
Glad you find it helpful, Sue. Thanks for reading.
Great tips for all of us, even those hand and machine sewing for decades. I think I’ll try this by hand as a baby quilt to work on during a Nov cruise. Then I’ll be ready to machine sew it. I like hand work on a longer cruise. I started a Knitters and stitichers group on The Norwegian Bliss while we were sailing through the Panama canal March 30 to April 14th, this spring. Sixteen ladies came every sea day. We had so much fun, sharing our sewing and getting to know each other.
That sounds like so much fun! Thanks for reading this blog post!
I am having trouble with the lone star quilt center star. It has a puff in the middle any tricks to help me
Hi Peggy — this is a tricky one! My first lone star had this issue and I “quilted it out”, using the quilting to get it to behave. If it is really bad, I would try and tame the puff with a dart.
Hi there…. this is not spam, I am a real person, Rosemary.🌟🌹
I just found your blog, this tips and tricks.
I never thought of making a lone star quilt, but I saw an amazing lone star quilt on Longmire series (netflix I believe) season 2 episode 11.
I immediately fell in mad love with the quilt on the hospital bed for realllll
Incredible. So I might try this, all thanks to your great advice.
I have a few quilts to finish before I hit Hobby Lobby for the kona.
here is the link to the youtube video with the quilt. It is so hard to see but OH my gosh. I need to make this…. It will require some thinking. 🥰
this is my real email too.
I am feeling determined
here is the youtube link. https://www.youtube.com/watch?v=C4ayhZvxSE0
Wow, thanks for sharing that clip Rosemary! Have fun with your lone star endeavour. 🙂
I’m looking for tutorials on getting two halves of a diamond to match the solid diamond in a animal design quilt any tips or suggestions will help this granny.
I am trying to learn the lone star it has been hard to match the points
Creative grids diamond dimensional ruler is a great ruler for cutting 45 degree strips. With 3 points of alignment before any cut is made keeps angle accurate
Thanks for the tip, Leisa!