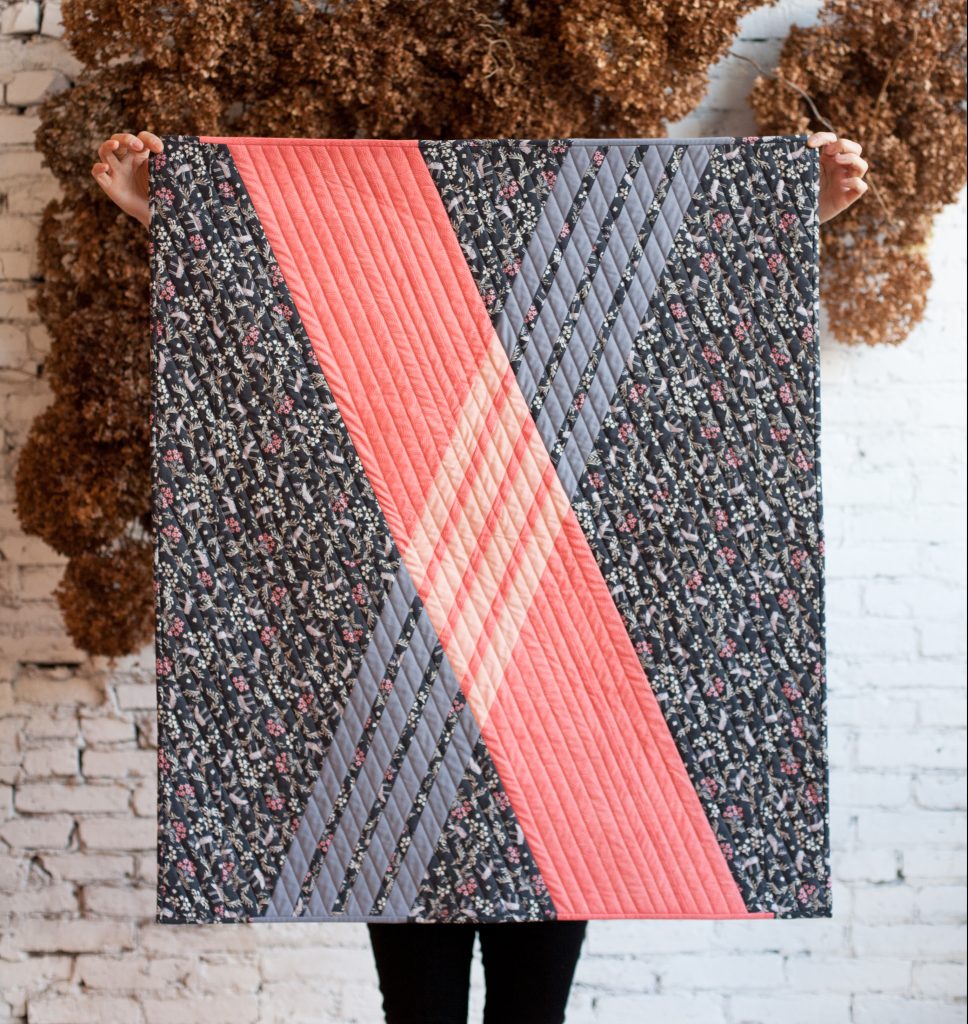
You’ve got a quilt top now it’s time for the next step: Trimming it and quilting it. Here are some tips on trimming accurately, quilting designs and thread selection.
Trimming
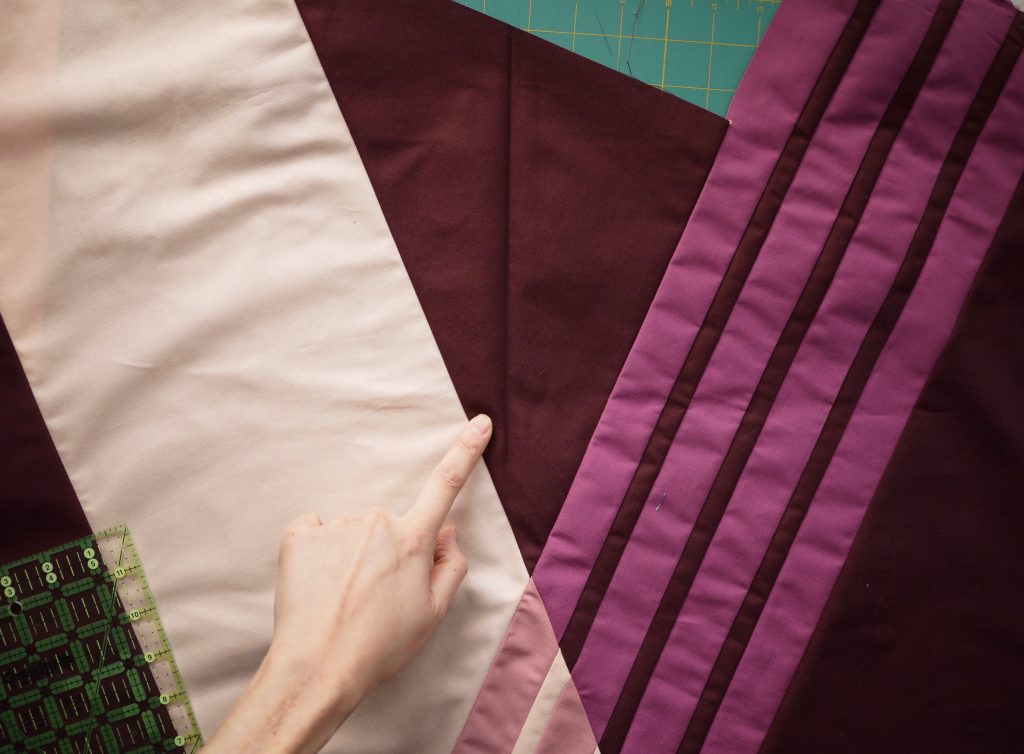
Finding the centre line. Fold your quilt top in half and press. This crease line will be your guide in figuring out where to trim. You will measure upward from the vertex of the X, where all four fabrics meet. This line falls parallel to the crease line. Make sure you are using the right measurement for your baby or lap size quilt. Mark it.
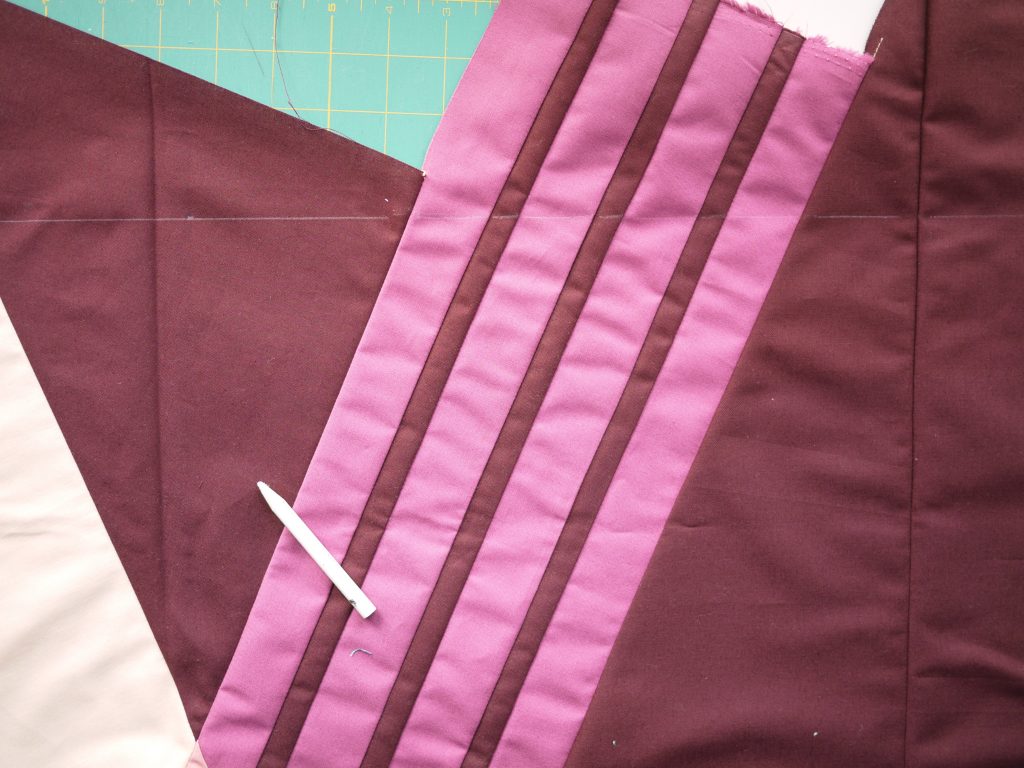
Draw a perpendicular line at the measured marking. A way to double-check that your line is straight is to see if it is also perpendicular to both side border seams. If you’ve done it right, it should be!

Once you’ve drawn your line, measure from the vertex to the line again, just to be sure. Then you can cut. (Keep your scraps for improv week!) Repeat with the other side of the quilt top.
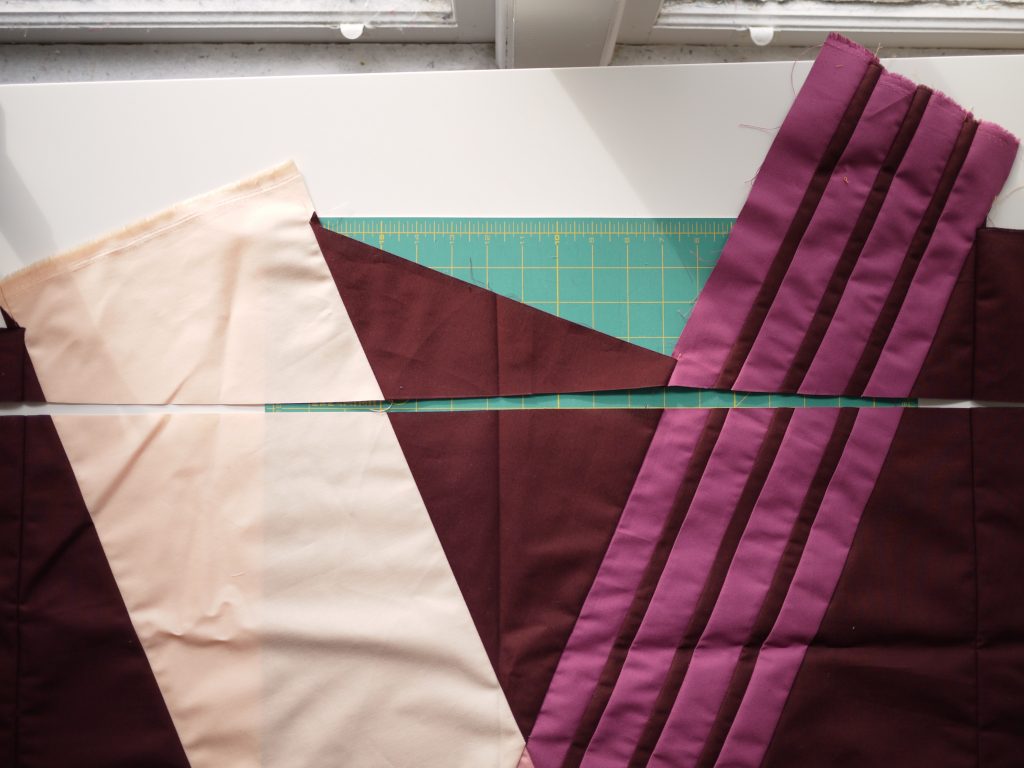
Now that you’ve cut it, handle the quilt top as little as possible. You’ve just cut some bias edges.
Baste using your preferred method.
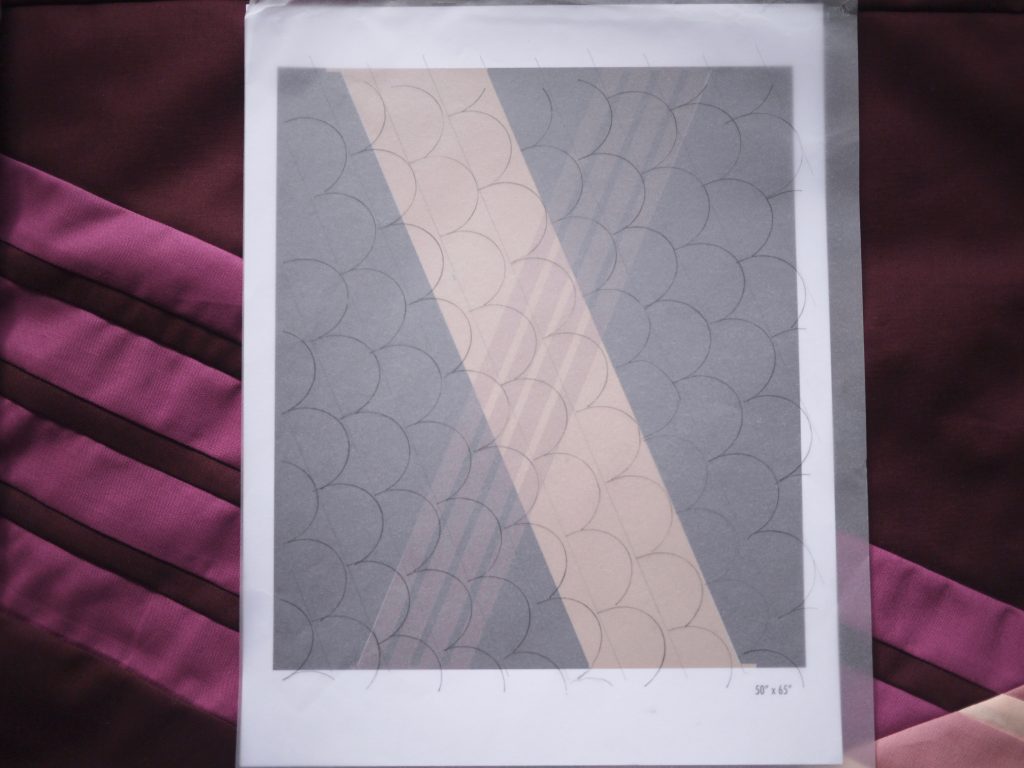
Quilting Plan
In February at QuiltCon, I took a class from the queen of minimalist quilts, Season Evans on how to quilt minimalist quilts. She gave us some tracing paper to get some quilting designs overlaid on our quilt designs (print-outs that we brought to class). You can do this on an iPad or smart phone over a photo of your quilt top, using the “Mark-up” tool. There are two main options for you to choose from: an all-over design or a complementary design.
All-over designs: These straight lines are perfect if just want to get it quilted and done!
These scallops are an all-over design but harder to execute on a domestic machine.
Complementary designs can:
- Highlight the X
- Downplays the negative space OR highlight it
- Complements the X
- Add a completely different element to the design
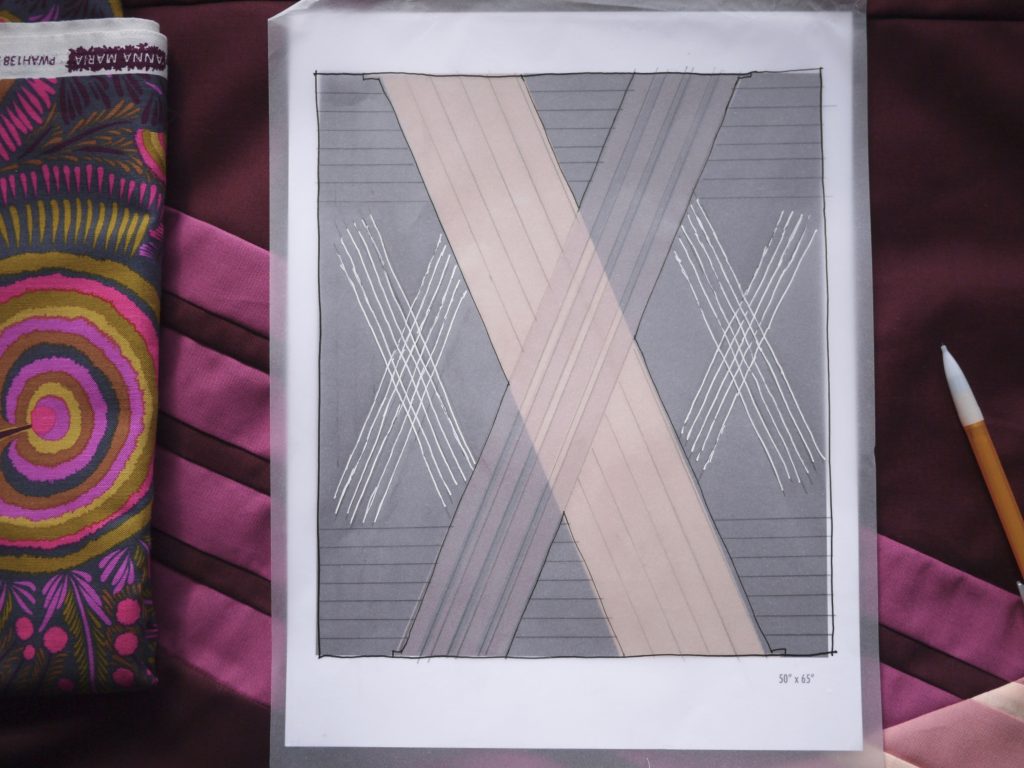
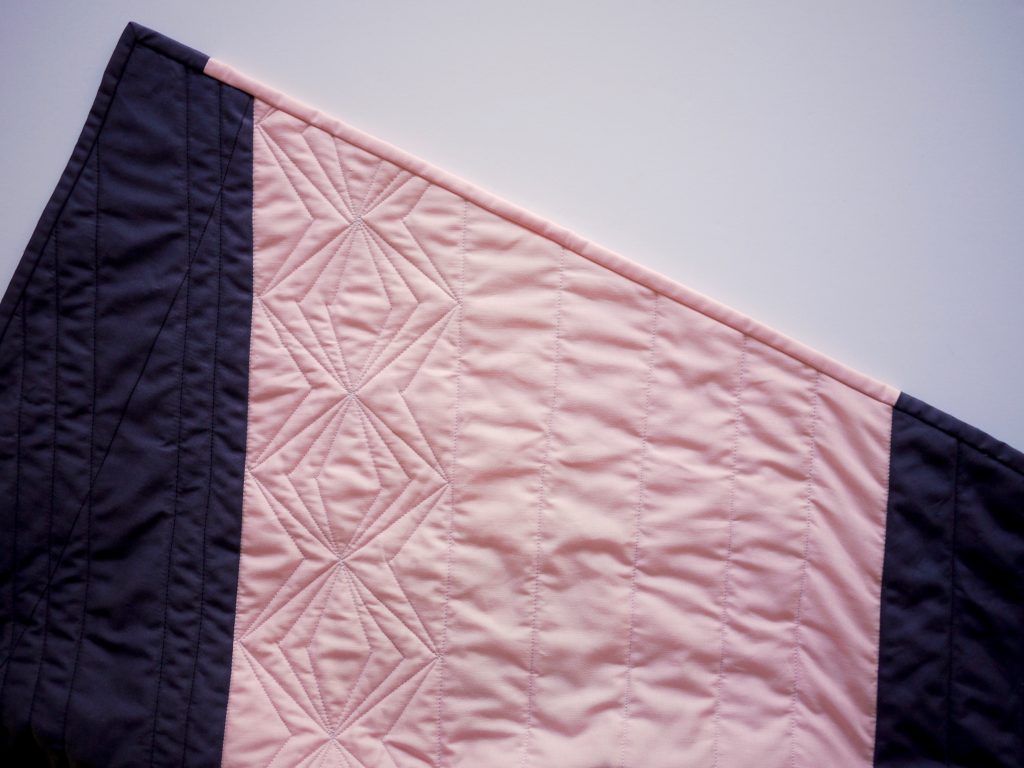
This sketch adds new design elements – Xs – to the quilt in the negative space. The horizontals help to emphasize the typographic nature of the design. Remember when you were learning to print, you had a top line and baseline to guide the size of your letter? That’s what I’m getting at. It will also emphasize the serifed binding.
I think mine will look something like this, but it needs some more thought still.
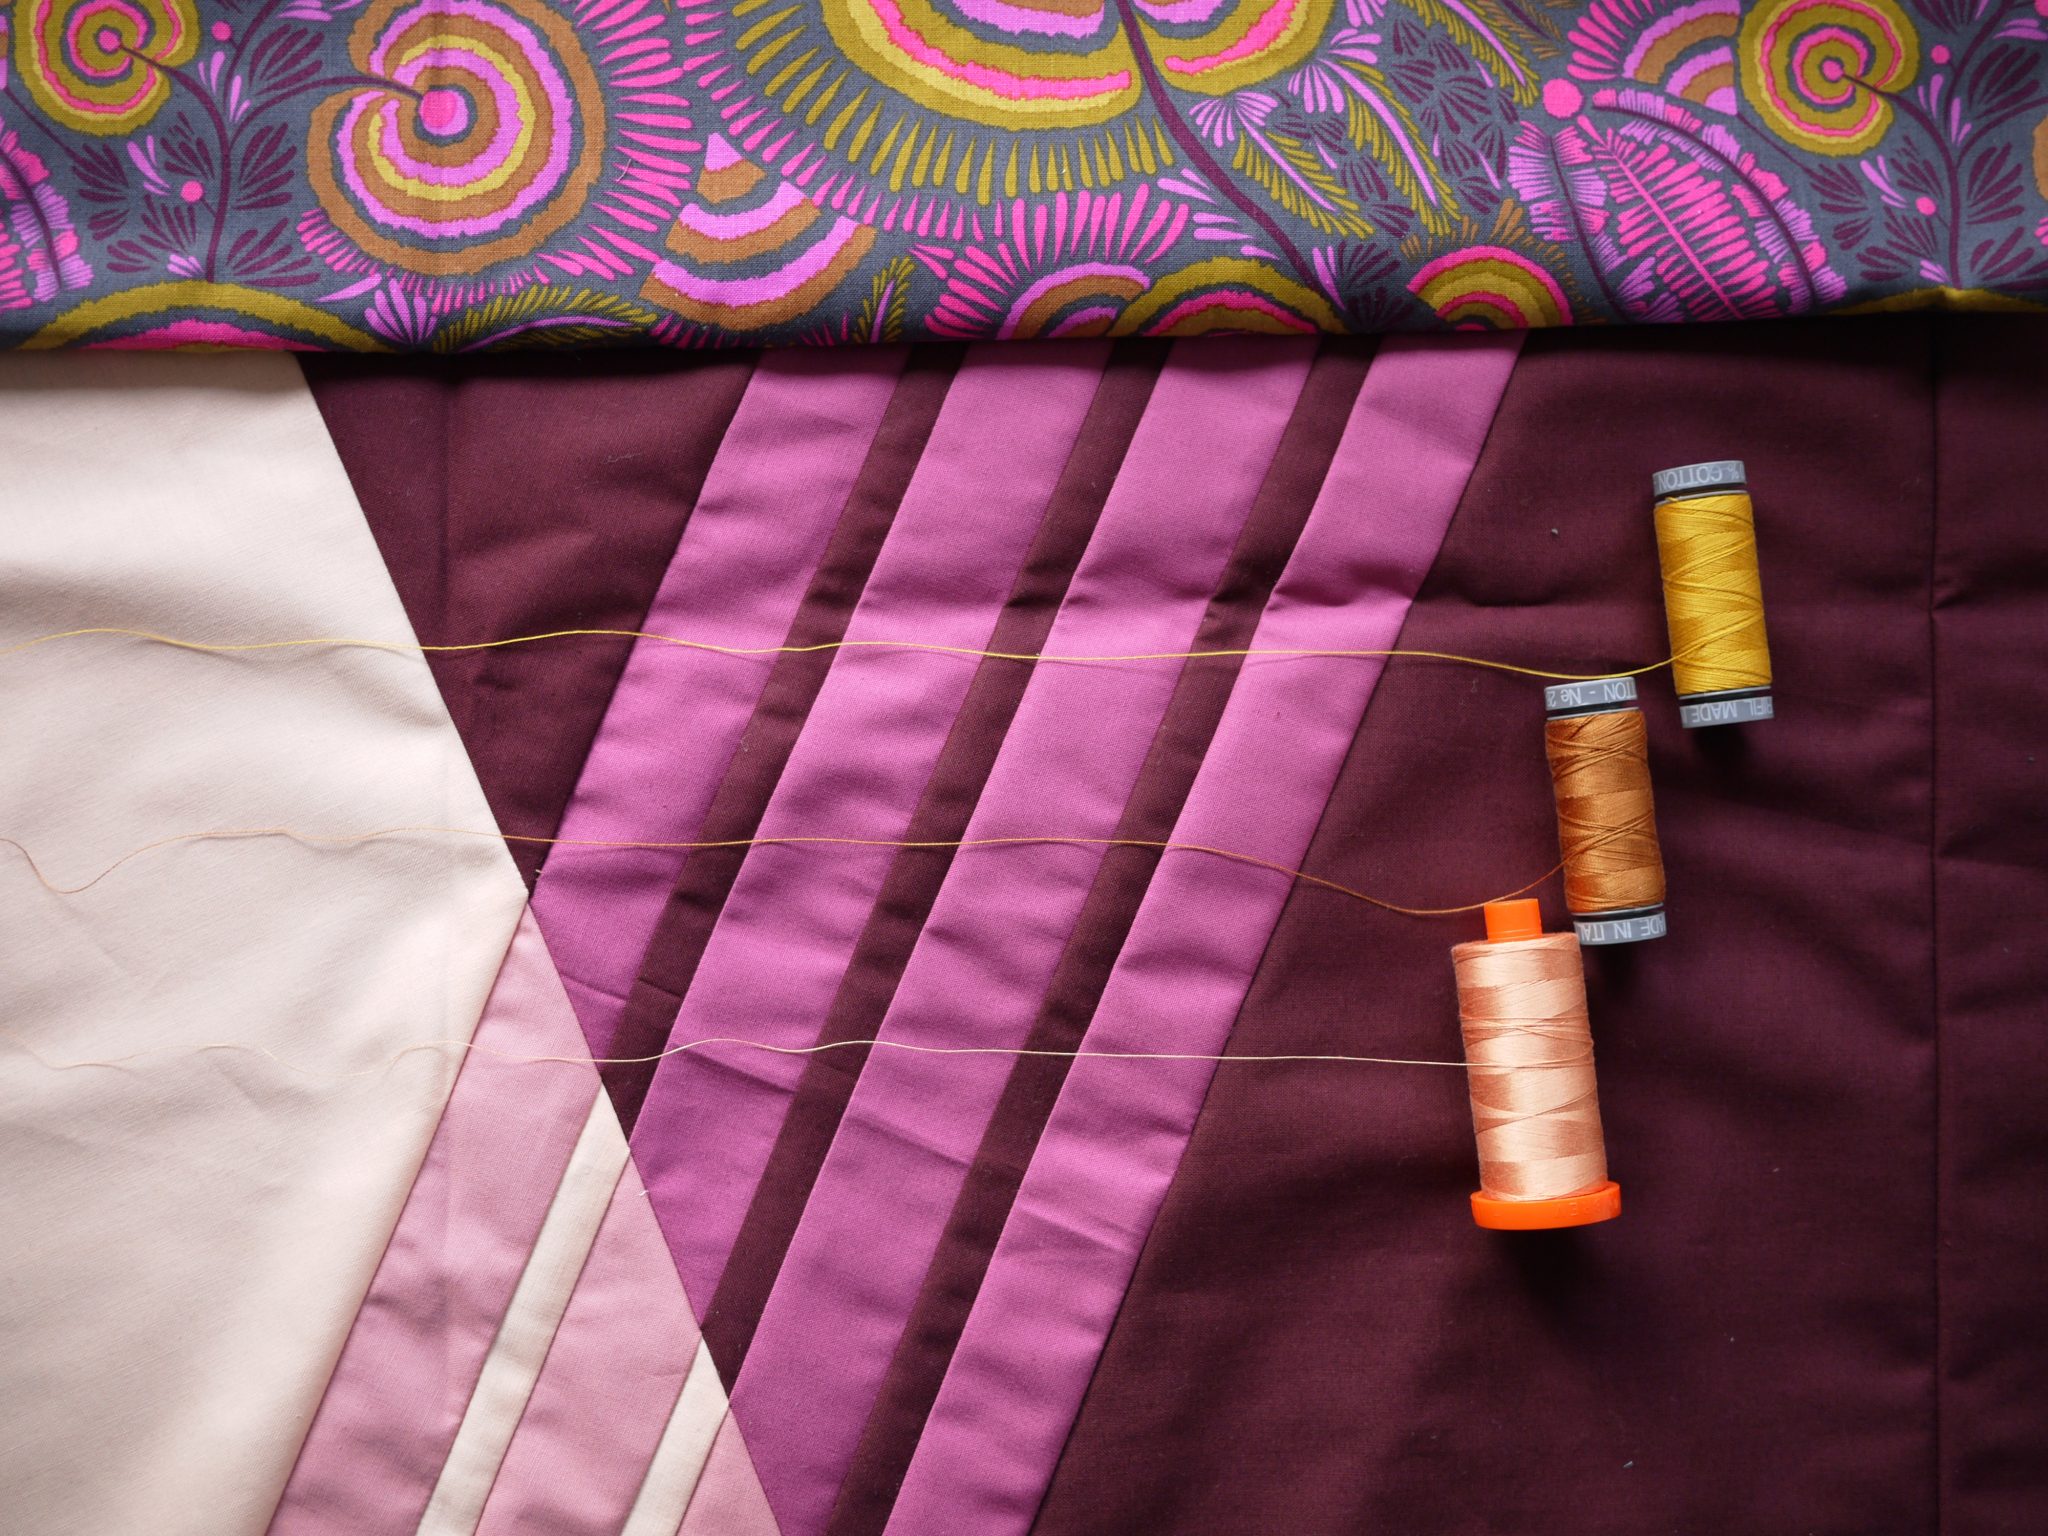
Thread Selection
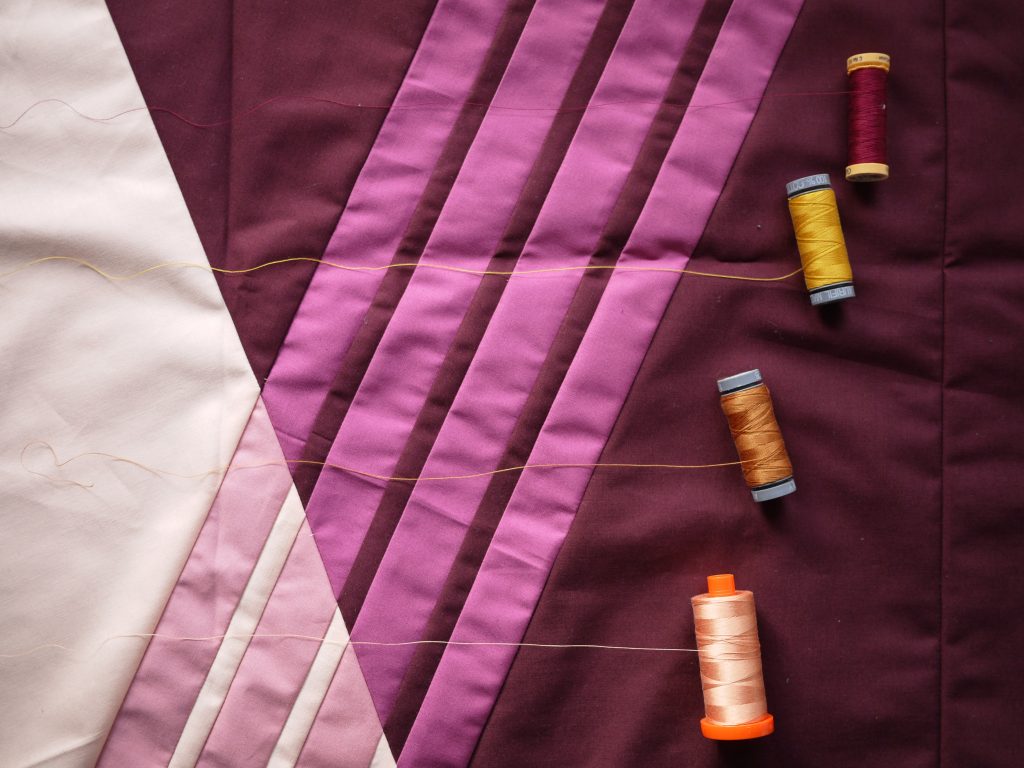
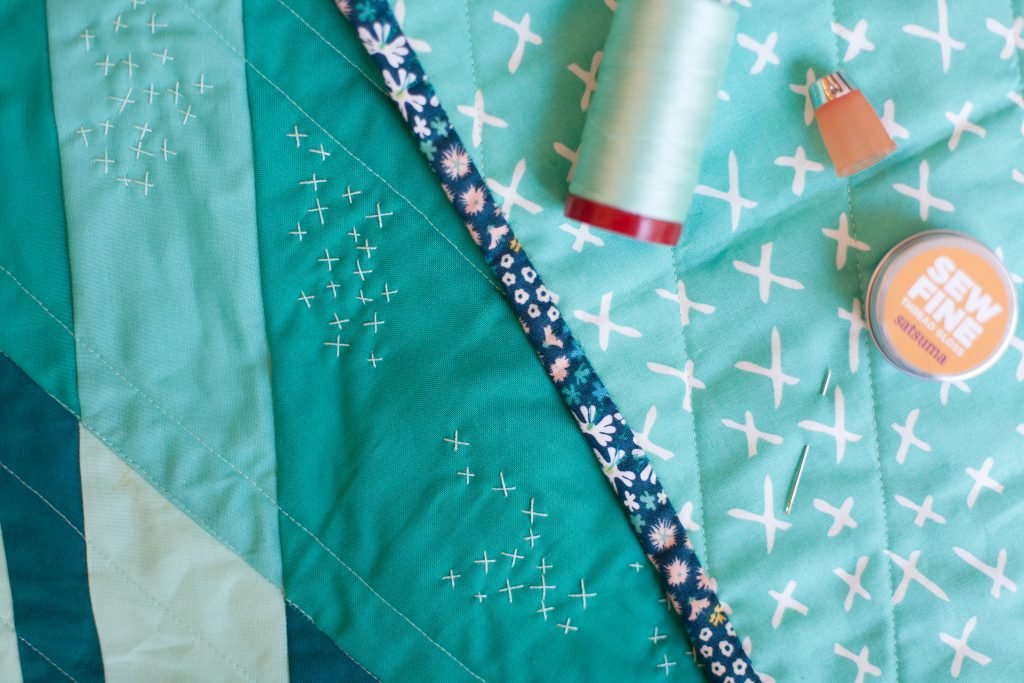
What do you have on hand? I am in love with Aurifil 50 wt 2215 which I used to piece the quilt together (bottom spool). It look great across all the colours of the quilt top.

The rust colour (Aurifil 2155) brings in a different colour from the backing fabric. The Gutterman up top will disappear nicely into the background fabric. I think I might bring in some hand quilting as well. I haven’t decided yet!
I’d love to see your sketches, quilt plan, thread choices and your process! Post them on Instagram with #everyonesgotanX or in our Facebook group. Here’s some more inspiration:

I’m undecided on a quilting plan but I might try echo X as your last photo.
It’s a simple and effective way to highlight the X!
I really like that dot-to-dot quilting you’ve shown… and the hand-quilted “X’s”, which really complement the print on the quilt back so nicely. Love seeing everyone’s creative process, and thanks for the trimming tips, Andrea.
Thanks so much for your encouraging words, Diana!