An easy way to spruce up your embroidery hoop for display is to wrap it. It brings the final product up a level for a finished look without using too much fabric or effort. When you’ve worked hard on a piece such as Canned Pineapples, it’s nice to give it a little extra touch.
Wrapping the hoop adds a bit of grip to the outer hoop to improve the tension of the embroidered piece. The results will make the framed work look its best!.
Choose a ribbon or fabric that compliments the main piece. In this Canned Pineapples hoop quilt, I used a fabric from the same fabric collection as the main fabric of the quilt block. It automatically complements the main fabric and brings out some of the greens in the quilt block.
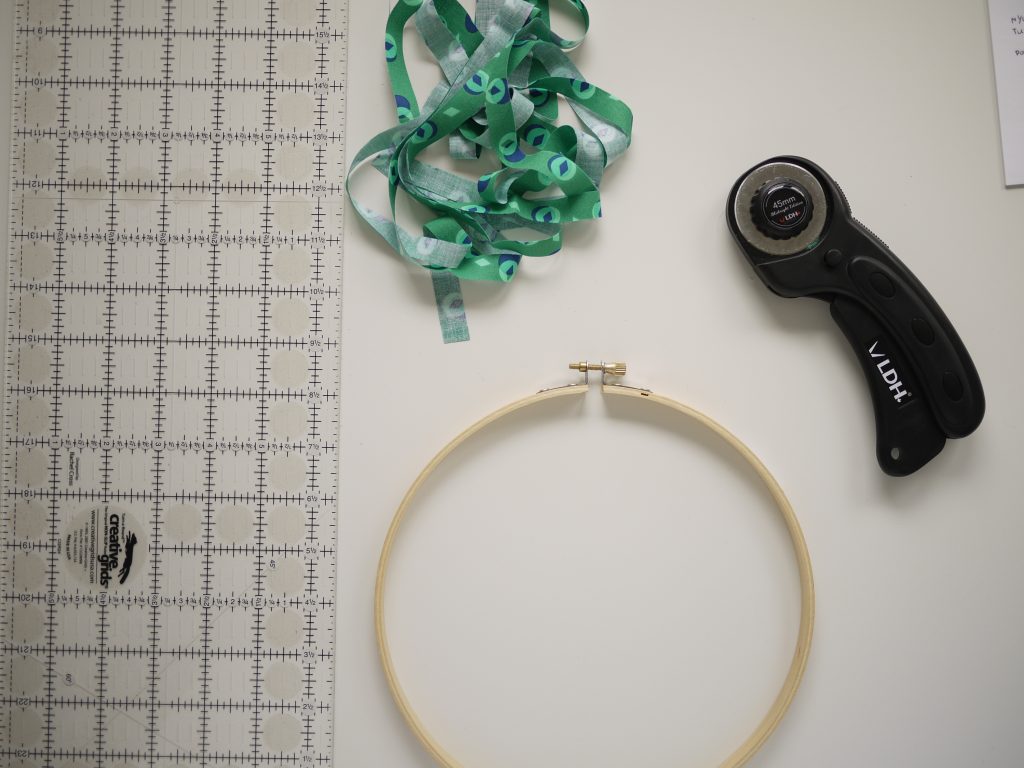
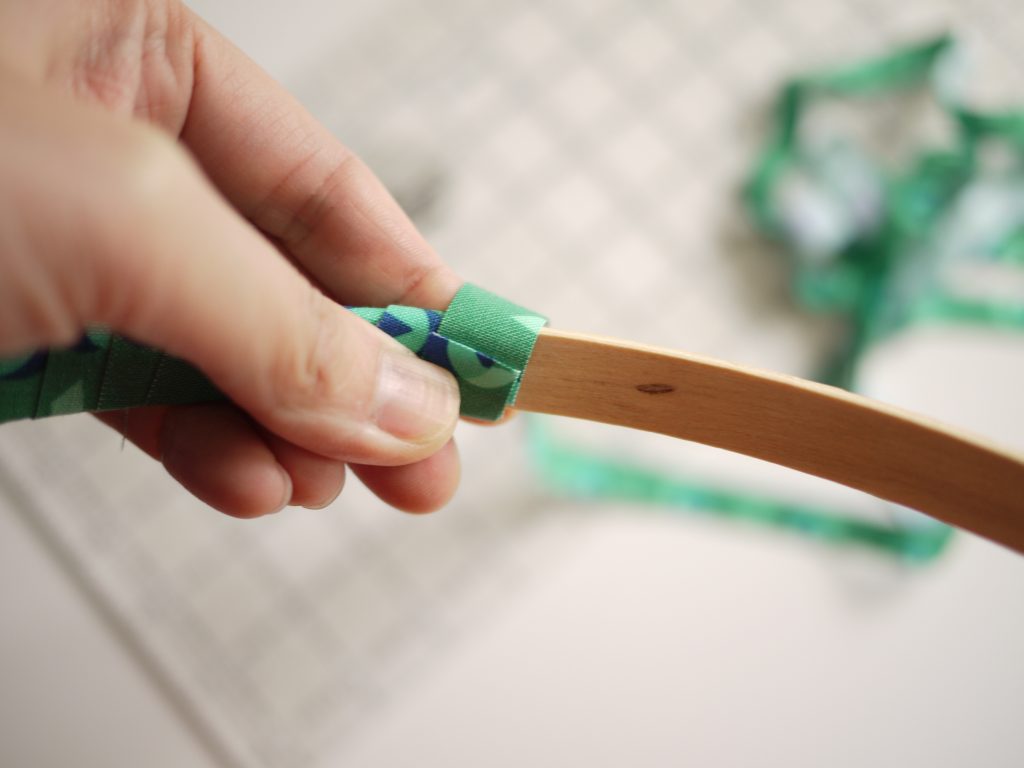
Cut your wrapping fabric into 1/2″ strips. For a 12″ hoop, I cut 8 strips off a fat quarter.
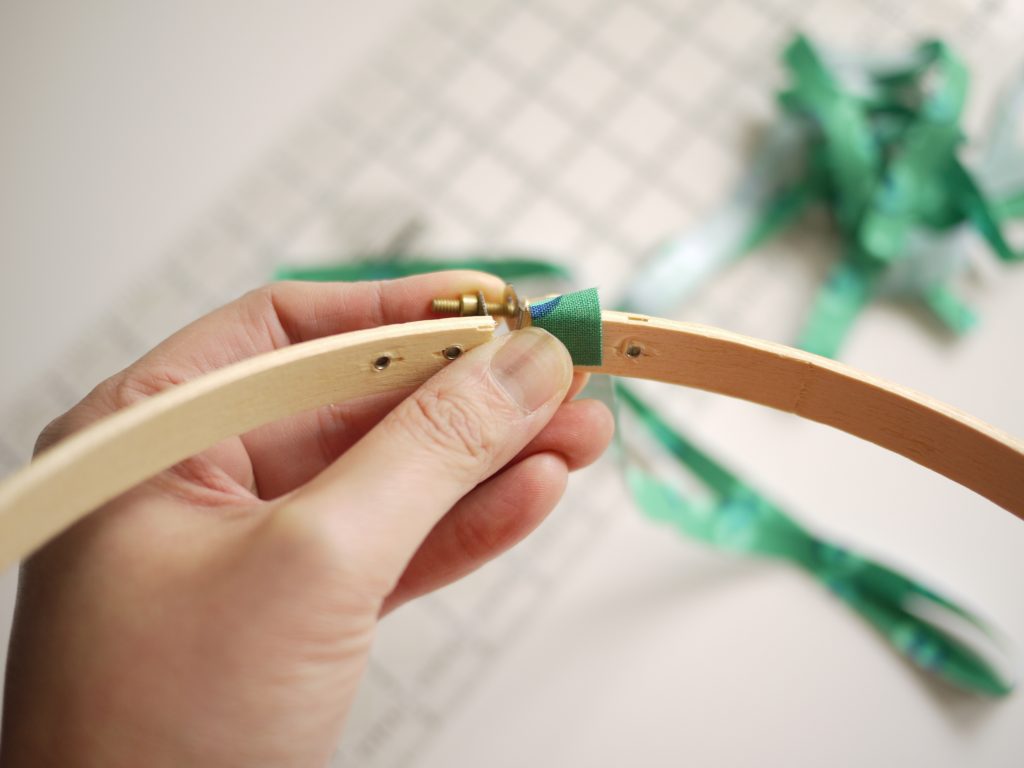
Separate your embroidery hoop into the inner hoop and the outer hoop. We will only be wrapping the outer one. Starting at the hardware of the hoop, wrap a fabric strip around the hoop. Start on the inner side, and wrap the fabric around to overlap and secure the strip in place. No glue is necessary.
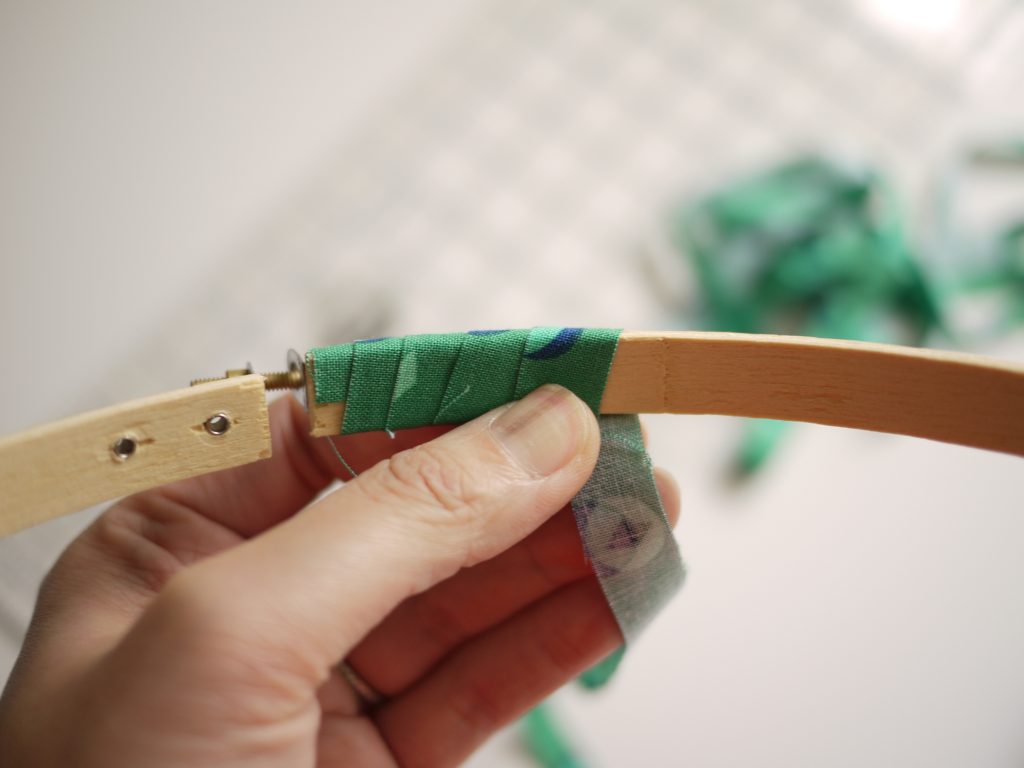
Adding more strips: When you come to the end of a strip, you can tuck a second strip under the first and wrap it around to overlap both strips.
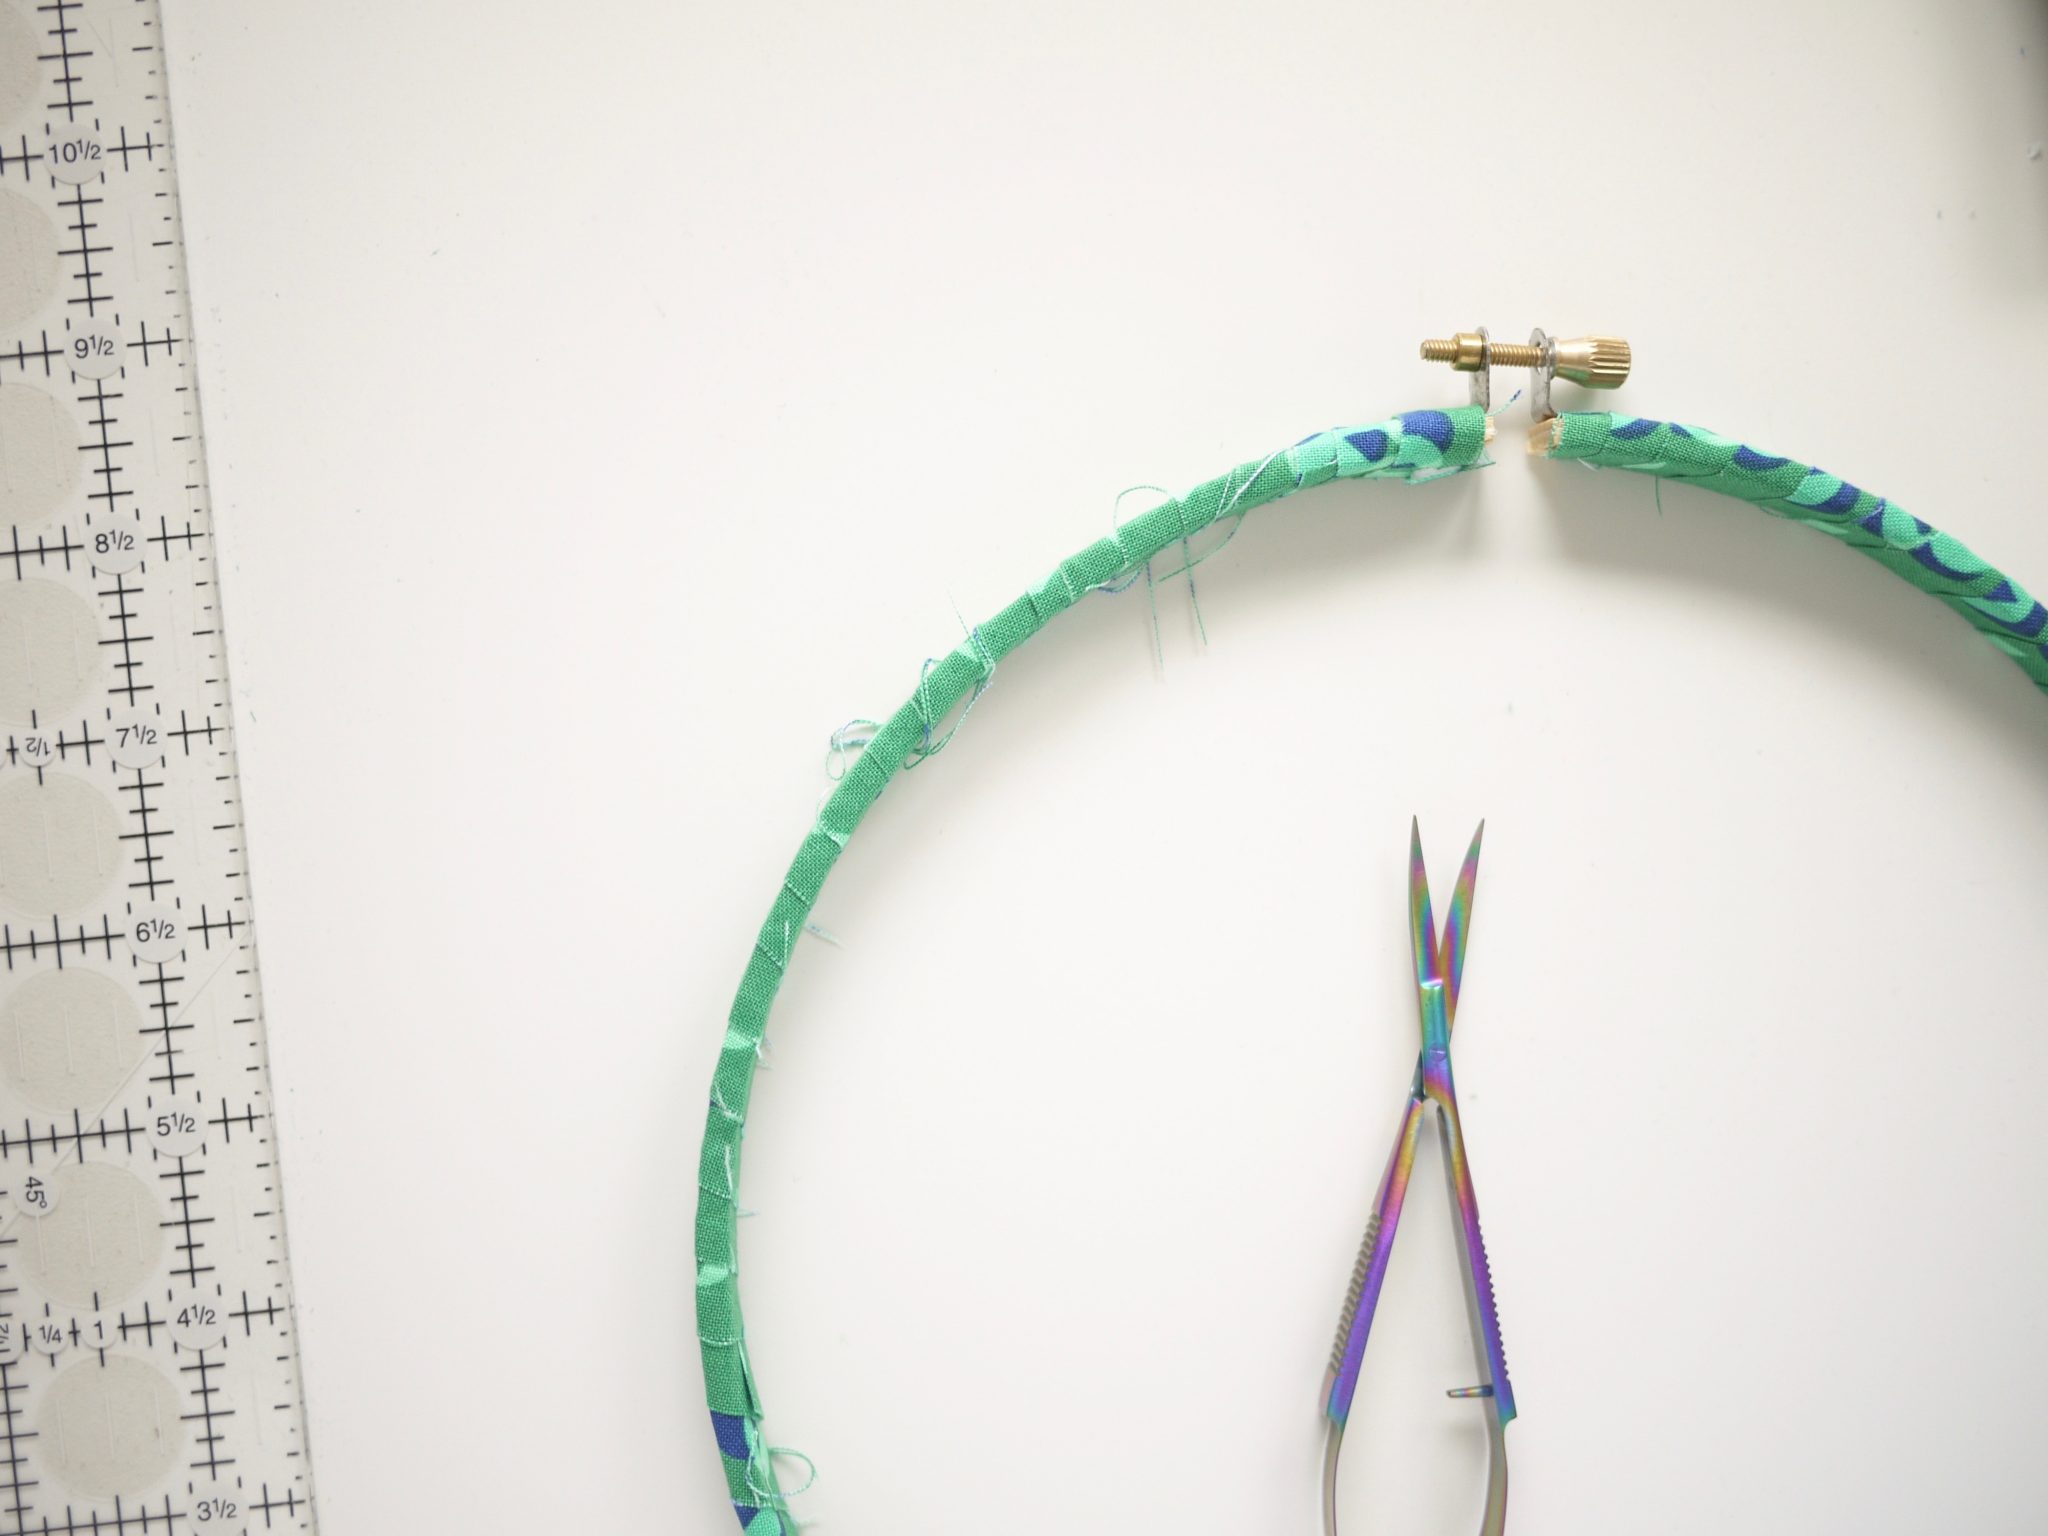
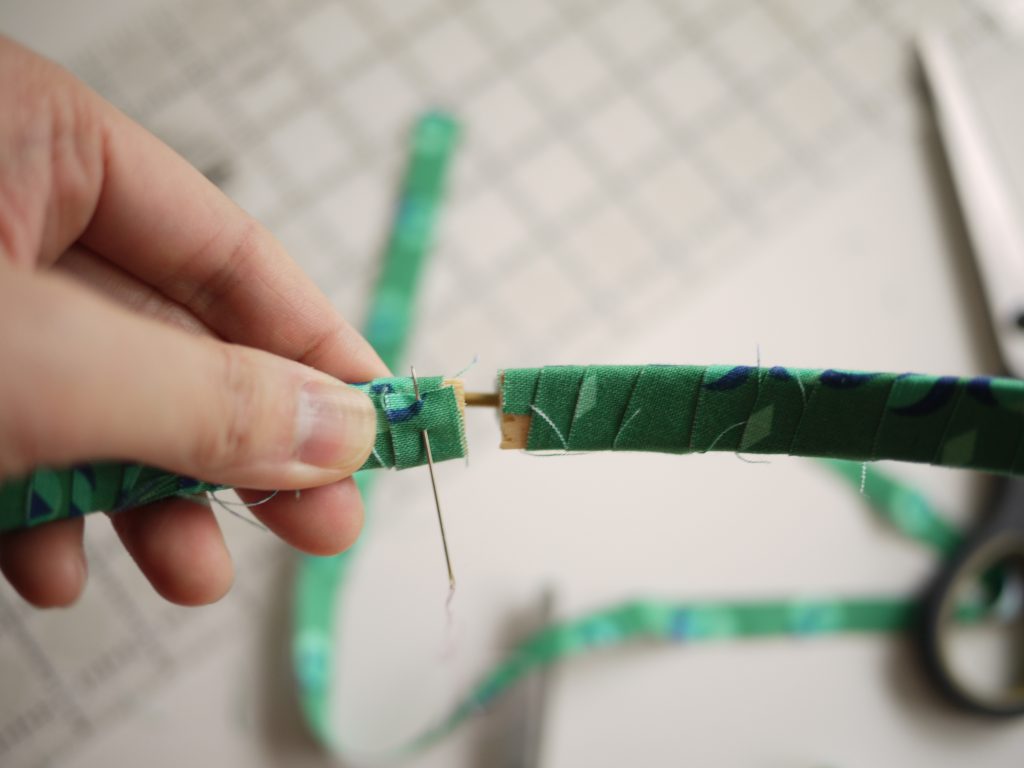
Continue till you come full circle to the hoop hardware again. Trim the excess off so the end is on the inside of the hoop and hold it firmly. Use a clip to hold the fabric in place while you get your glue or needle/thread ready.

Glue or stitch the end in place.
Snip away any “fly-aways” to get it neatened up. Alternatively, you can do this after the embroidered piece is framed.

Voilà – a custom look to your framed piece!

Trackbacks/Pingbacks