What is a scant 1/4″ seam allowance? Why do I need it? How do I get it? This post will answer all your questions about this quilting term!

What is it?
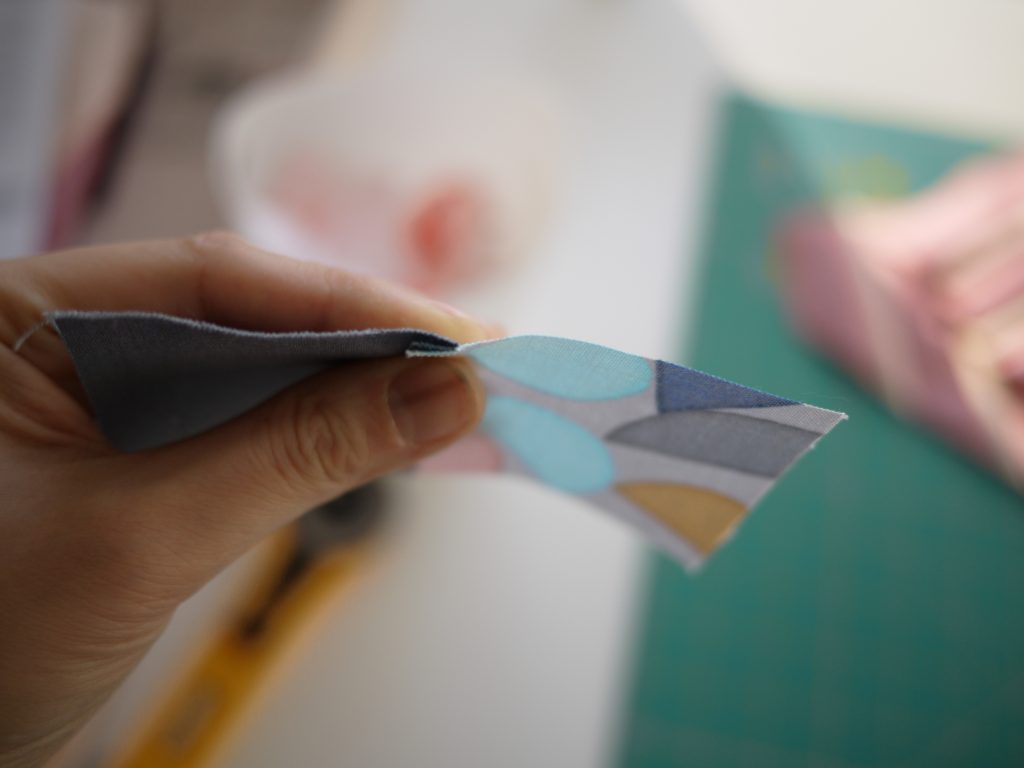
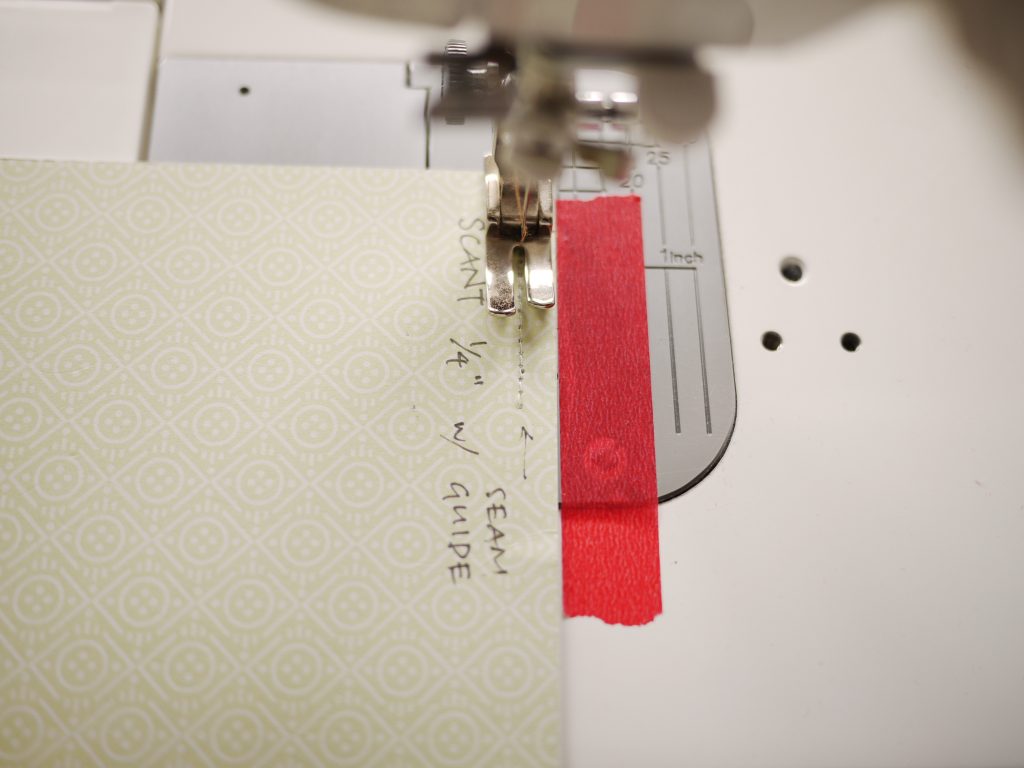
A scant 1/4″ seam allowance is a seam allowance that is ever so slightly narrower than one 1/4″ inch. You can notice here that where the seam folds in, the top of the assembly dips a little. A few of the fibres of the fabric that get swallowed up in that dip. A scant 1/4″ compensates for the loss of some fabric in the folds of a seam, so that the dimensions of your block remain true.
Why should I care?
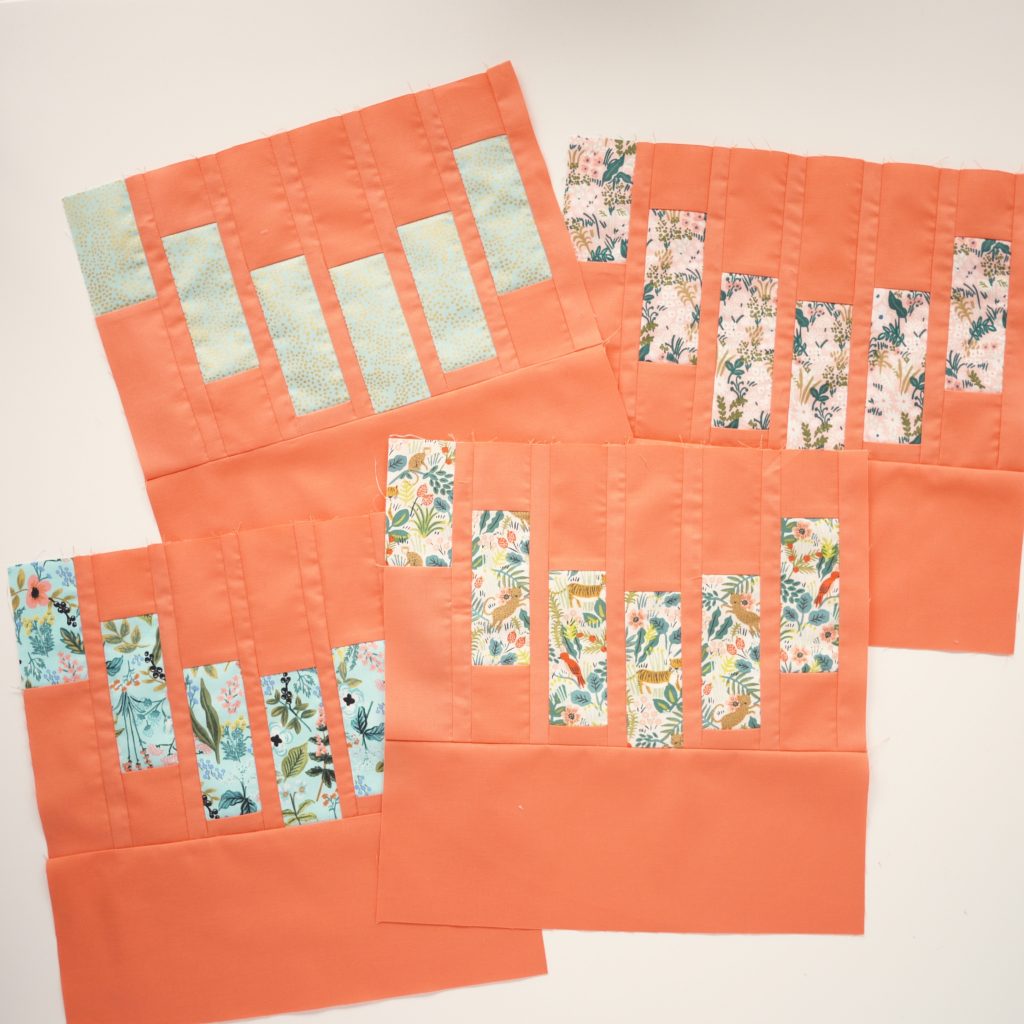
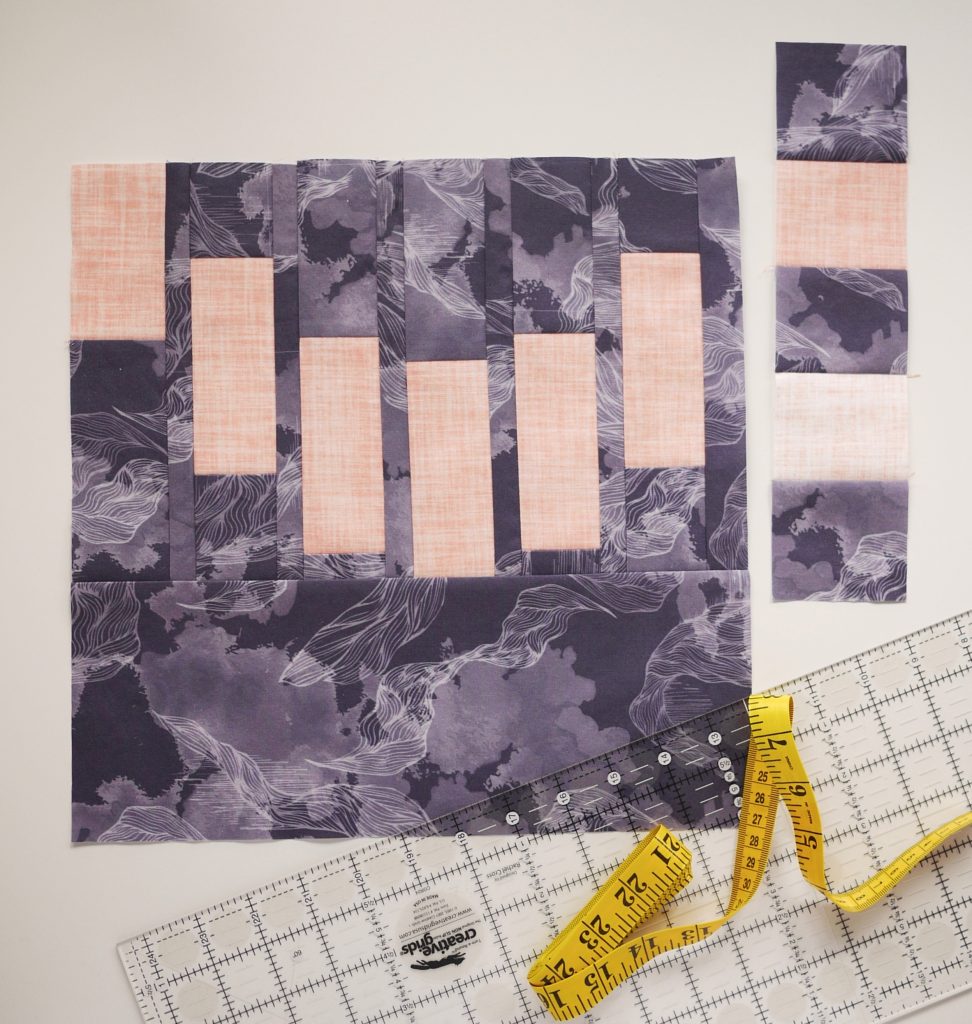
See this block here? It’s from my newest pattern, Striped Scallops. There are eleven vertical seams in this 12 1/2″ (unfinished) block — ELEVEN! If you use a “true quarter inch” seam, you lose a little bit in each seam and by the end of it all, it’s noticeably smaller than that bottom rectangle, which has been accurately cut at 12 1/2″. See the teal block below.
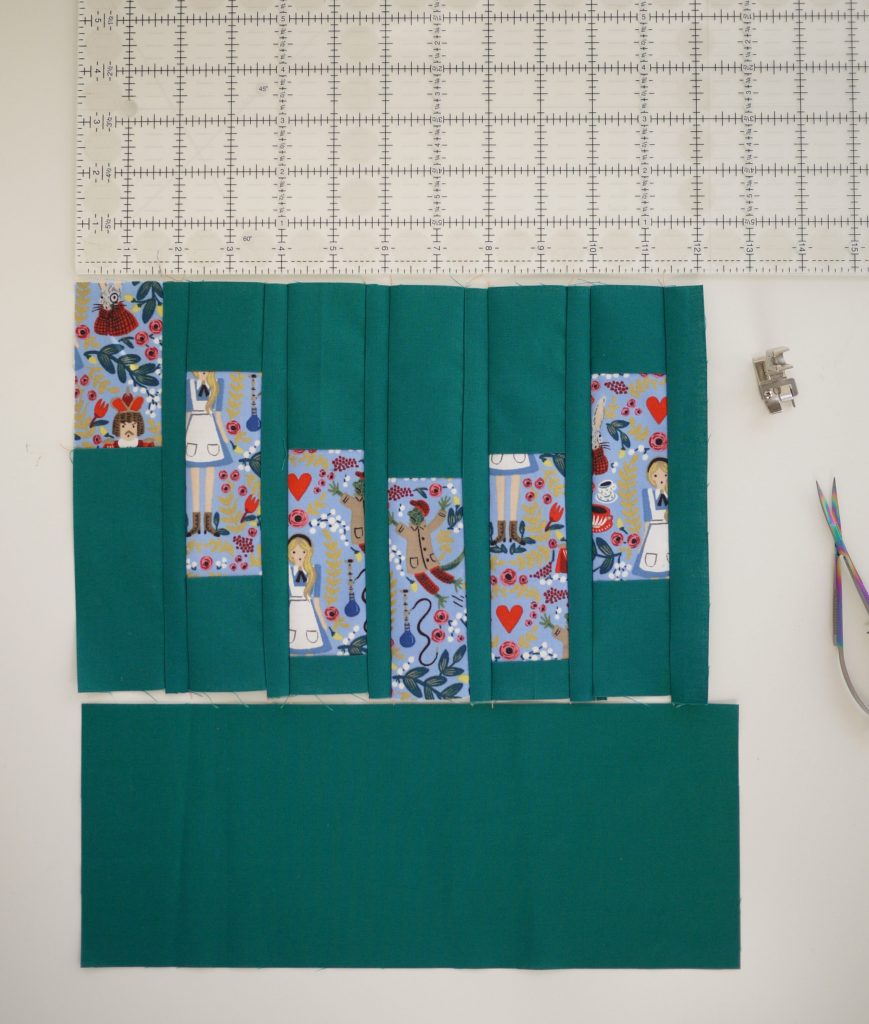
In my experience, ignoring a scant 1/4″ is most noticeable and puzzling when a pattern has seams meeting a perpendicular (such as Banner Year and even a traditional log cabin). Multiple seams meeting at a single perpendicular, like in this Striped Scallops, exacerbate the issue. The tiny bites those seams take out your fabric start to add up!
How do I get it?
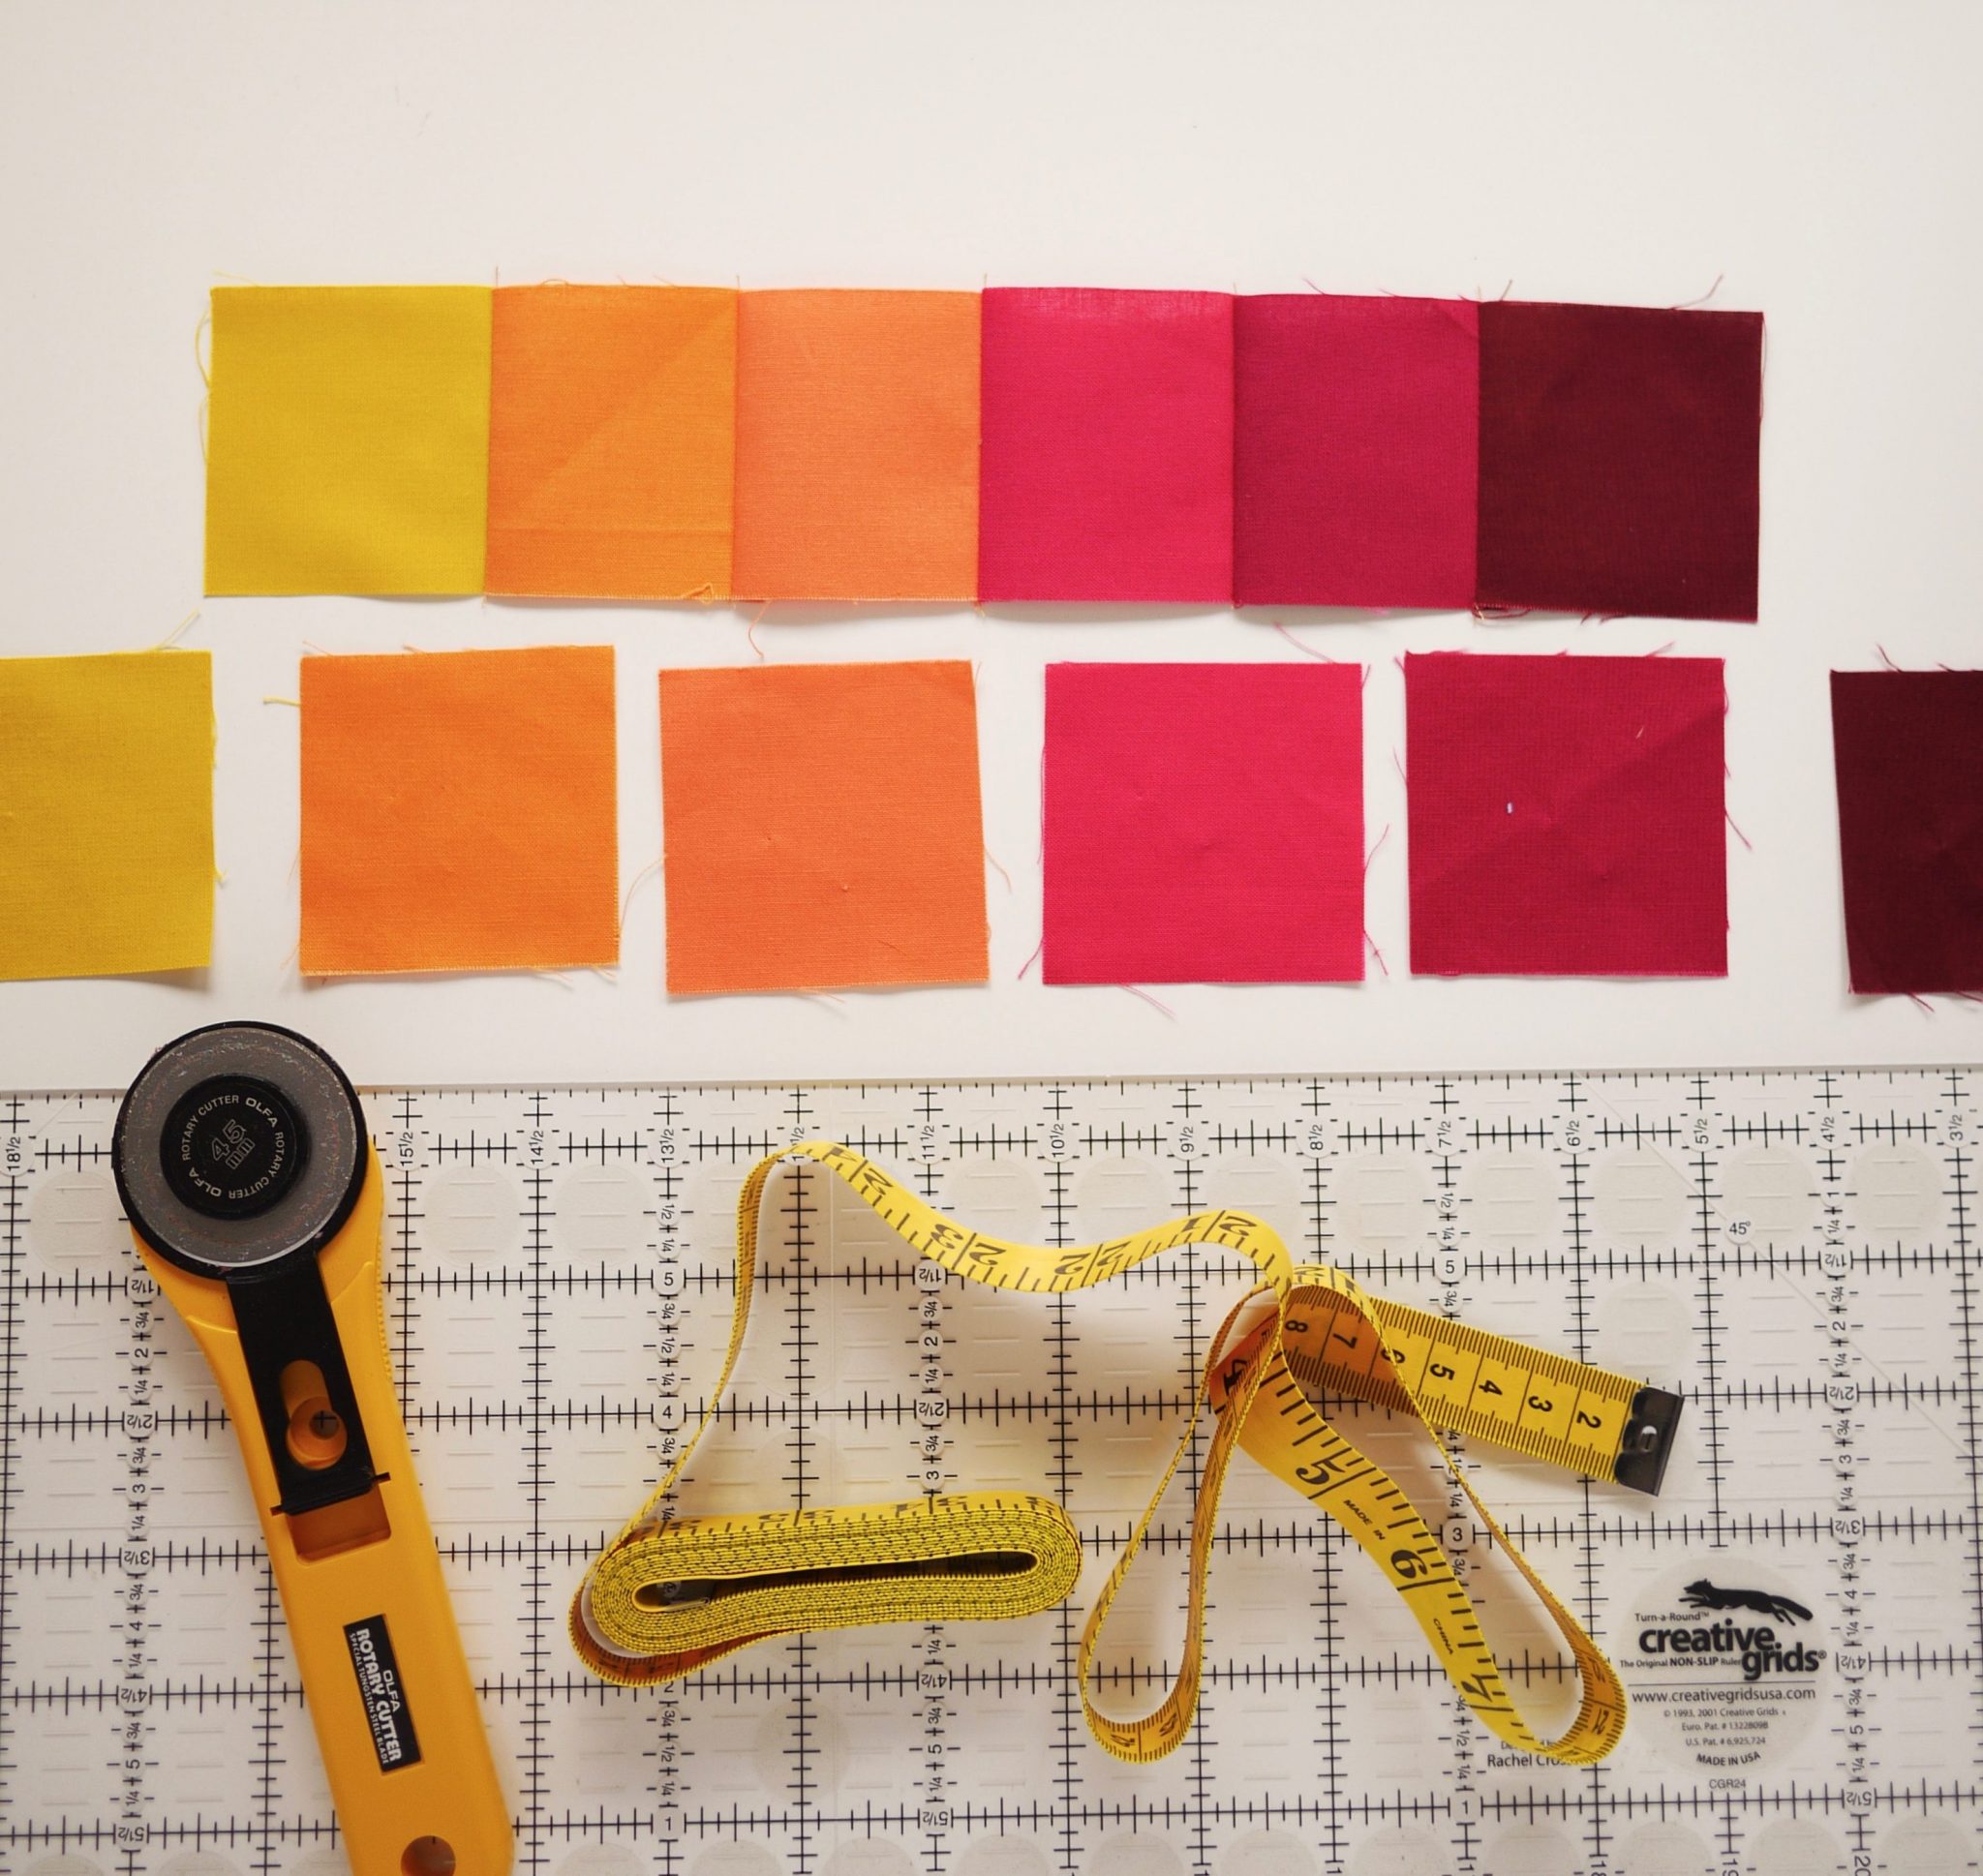
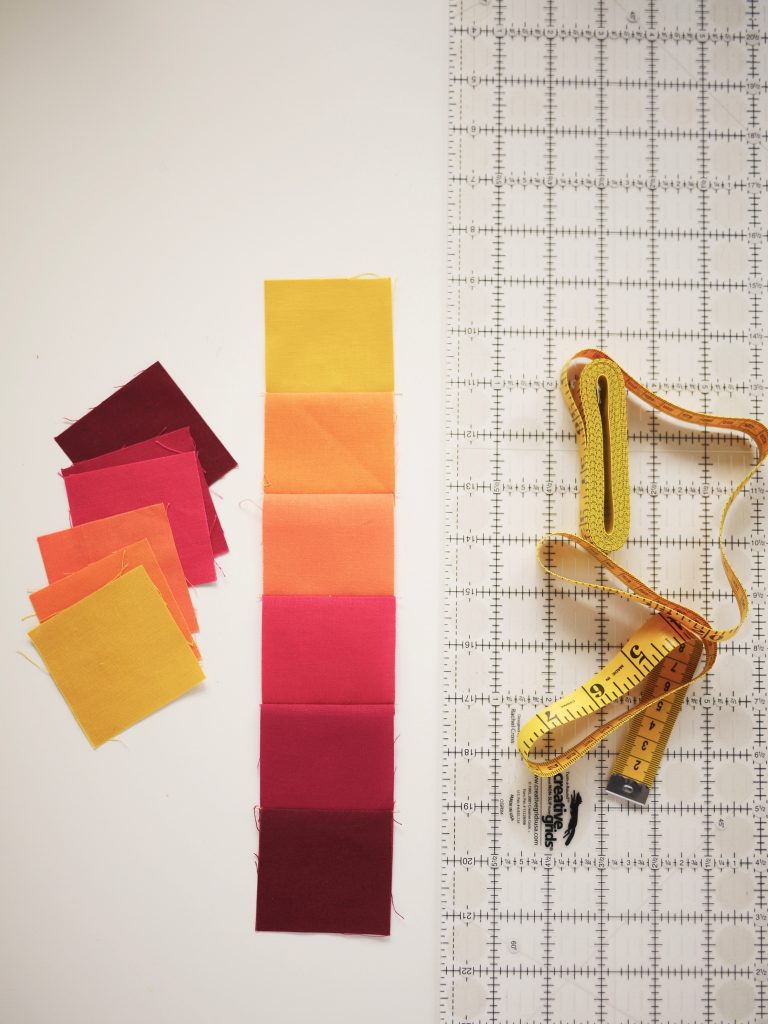
It’s a matter of testing! Cut six 2 1/2″ squares. It’s best to use contrasting fabrics and alternate them. Don’t follow my example of this six-squared gradient. Although it’s pretty, it’s harder to see what you’re looking for!
Sew the squares together into a row, using a reference that you think is a good 1/4″ seam allowance. This might be a tape line on your sewing machine, a 1/4″ foot, the edge of your normal foot. Press all the seams to one side or press them all open — whichever is your general preference. Get your ruler out and see what you’ve got.
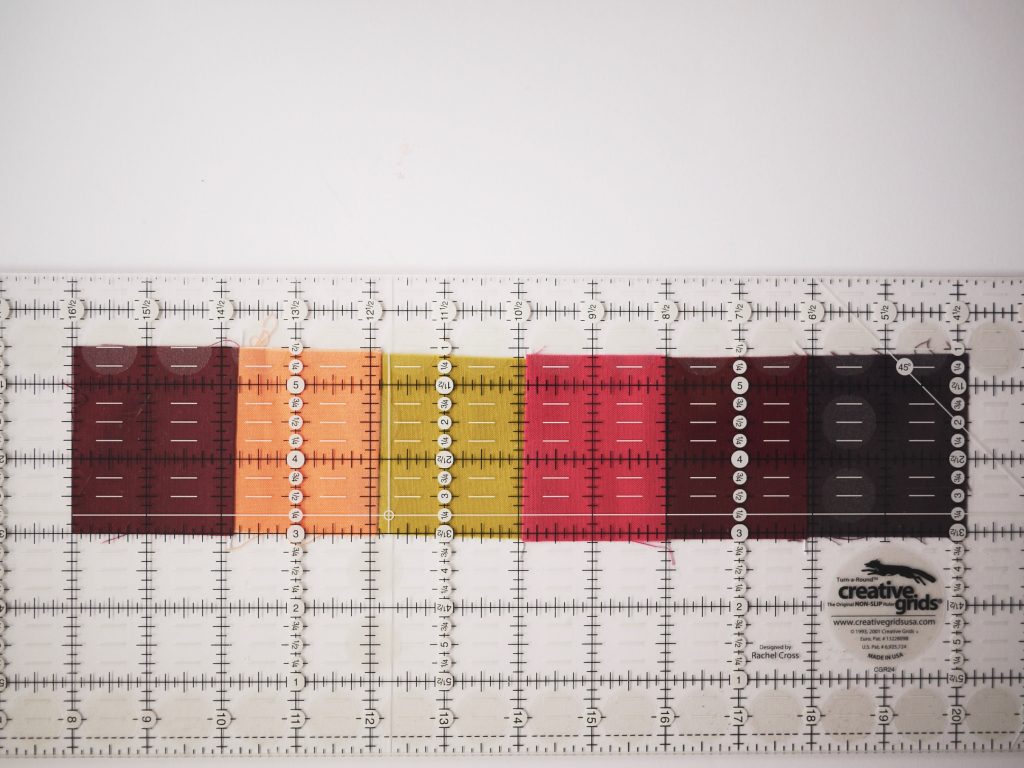
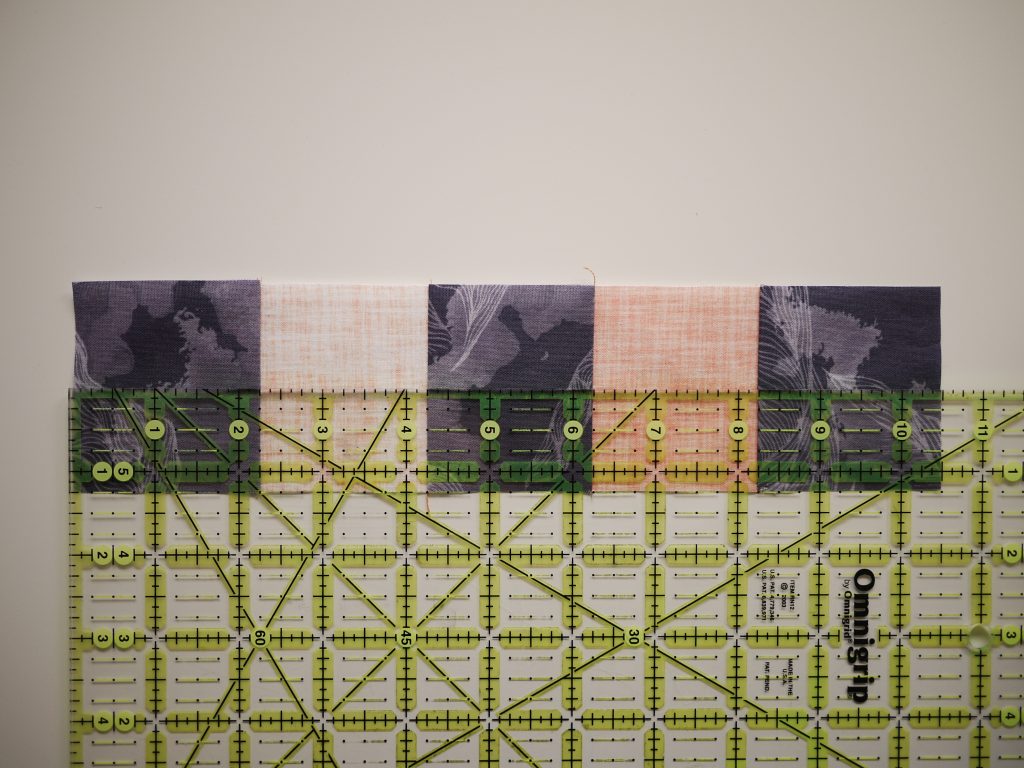
The six squares above should theoretically add up to a row that measures 12 1/2″, right? It is actually only 12 1/8″! Yikes. If you look at the 8 1/2″ mark and follow the squares going to the left, you can see that each is a bit smaller than 2″. This means that the seam allowance is too big and I need to make it narrower.

Adjust your reference – move your tape line, change your sewing machine foot, or adjust your seam guide. I use a Janome Seam Guide (affiliate link) on my Juki. Repeat the exercise with new squares till you get accurate 2″ widths and the right overall length.
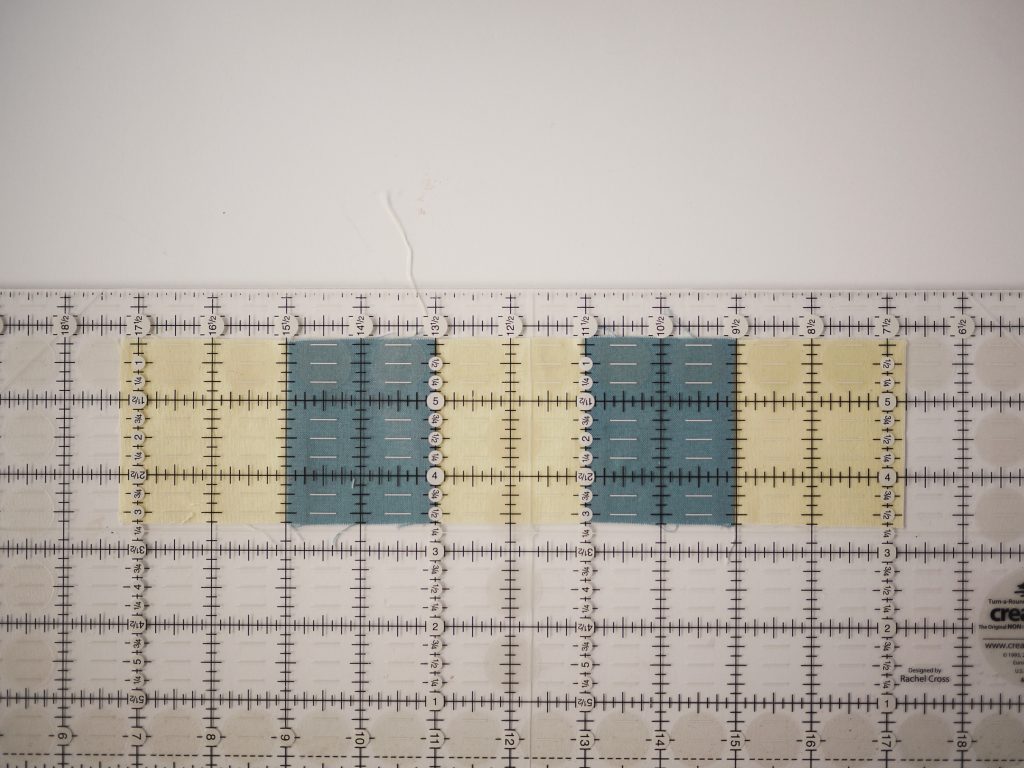
This one is five squares; each colour is 2″ and the overall length actually measures 10 1/2″. This is it! We’ve found it!
Keep a reference
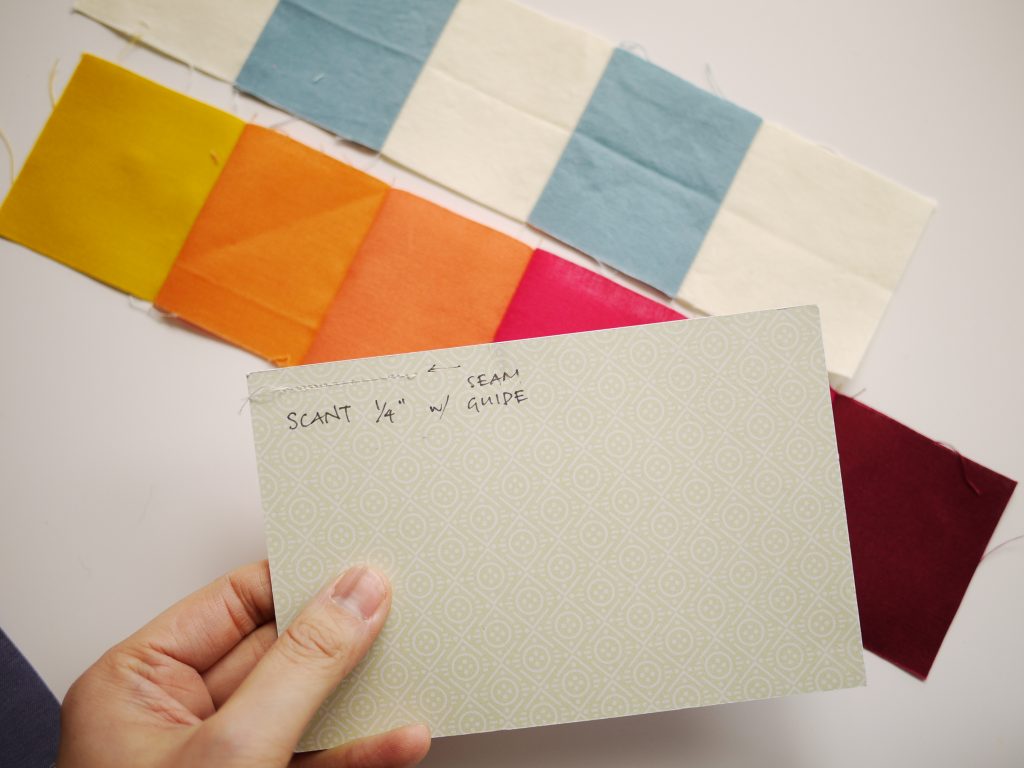
I “recorded” this accurate scant 1/4″ on a postcard so that I can set up my seam guide in a jiffy. Once I found the scant 1/4″, I sewed a line on a postcard and labelled it. I keep it next to my sewing machine so if I have to set up my scant 1/4″ with my seam guide, it’s easy to find.
Some considerations
Pressing seams open vs. pressing seams to one side: This here is not a debate of which is better – open or to one side. Rather, I am telling you if you prefer pressing your seams to one side, make your scant test that way. If you are a press-open type, do your test with your seams open. Each method will yield different results because there is a differing amount of fabric folded under at the seam. No use testing in conditions that are not true to reality!
Different substrates: Different fabric manufacturers and different weights of fabric will have a different scant 1/4″ because of the amount of bulk at the seam. I usually use one manufacturer for a whole quilt and mostly in quilting cotton, so one test for that manufacturer usually suffices. If you like mixing manufacturers (and you should, it’s fun!), it gets a bit dicier. However, unless you are working with vastly different substrates — like cotton lawn and quilting cotton — you should be fine. Art Gallery has a noticeably different “hand” (different tactile feel to the fabric) because of its thread count so this may warrant some experimentation if you’re mixing it in. A linen/cotton blend is also noticeably heavier and will need another test.
This fabric is Spoonflower’s New Petal Signature Cotton. It felt a bit heavier than the quilting cottons I was used to using so I thought I should test it out with 5 x 2 1/2″ squares. And my hunch was right… I needed a narrower 1/4″ to get it to be accurate. This test doesn’t take too long, so if you’re in doubt, do a test with your chosen fabrics before you start a project. Especially if the project at hand is a higher-stakes one — high time or fabric investment!
There you have it. A scant 1/4″ seam allowance. It’ll help you with your accuracy!
This is by far the best explanation I’ve ever read of why a scant 1/4″ matters — and the only one that has ever made me care or think it’s worth the effort! I totally get it now. Thank you!
Excellent tutorial! I’ve been looking into this, because I’ve had problems with my blocks for the Gypsy Wife Quilt being ever so slightly too small. But this is the most useful tutorial on the subject that I’ve seen. Thanks so much!
Excellent tutorial!
Thanks so much, Joan!