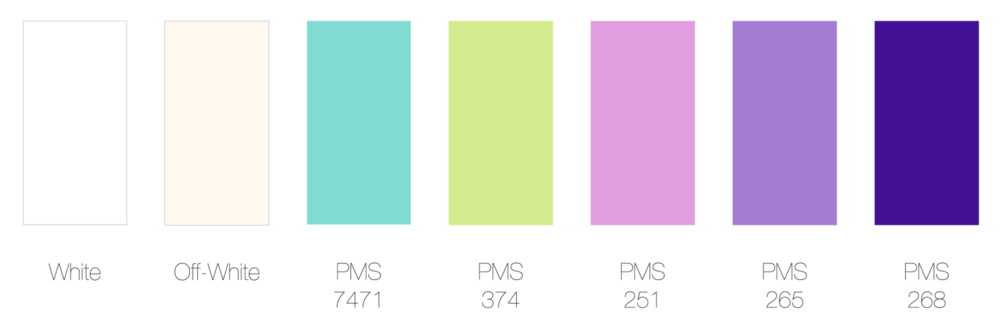
The call for 2019 QuiltCon charity quilts is twin-sized group quilts in a specific colourway (above) using this year’s theme, small piecing. The guild that I am a part of, the Maritime Modern Quilt Guild, will be submitting a quilt and we will incorporate the theme in two ways: Improv skinny strip sets and “inset seaming” (itty bitty ~1/8″ insets!). First, we will make strip “slabs” and secondly, we’ll inset them into a block. This tutorial is geared specifically to the charity are making as a guild, but of course, feel free to try out this technique on your own.
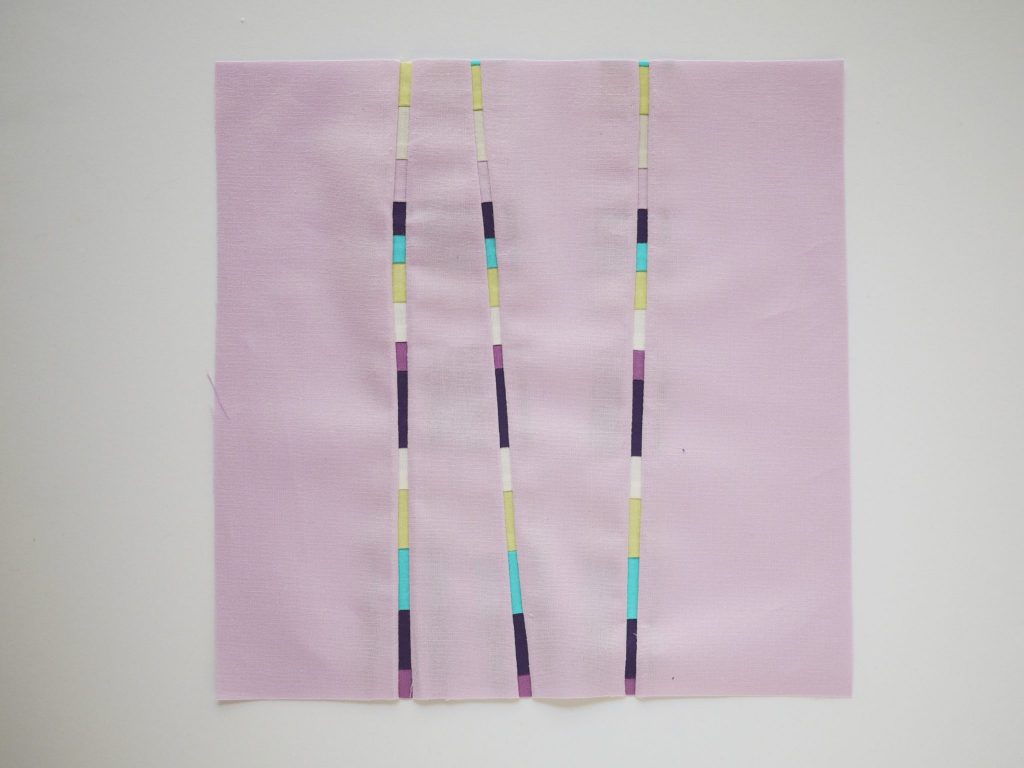
MMQGers: Each participant will make four blocks, all with the same background colour. The blocks will have 1, 2, 3, and 4 inset seams respectively. We will use the leftover strip slabs in the final composition of the quilt, so please hand those in along with your completed blocks. Please have your blocks handed in by September’s MMQG meeting: Thursday, Sept. 13, 2018.
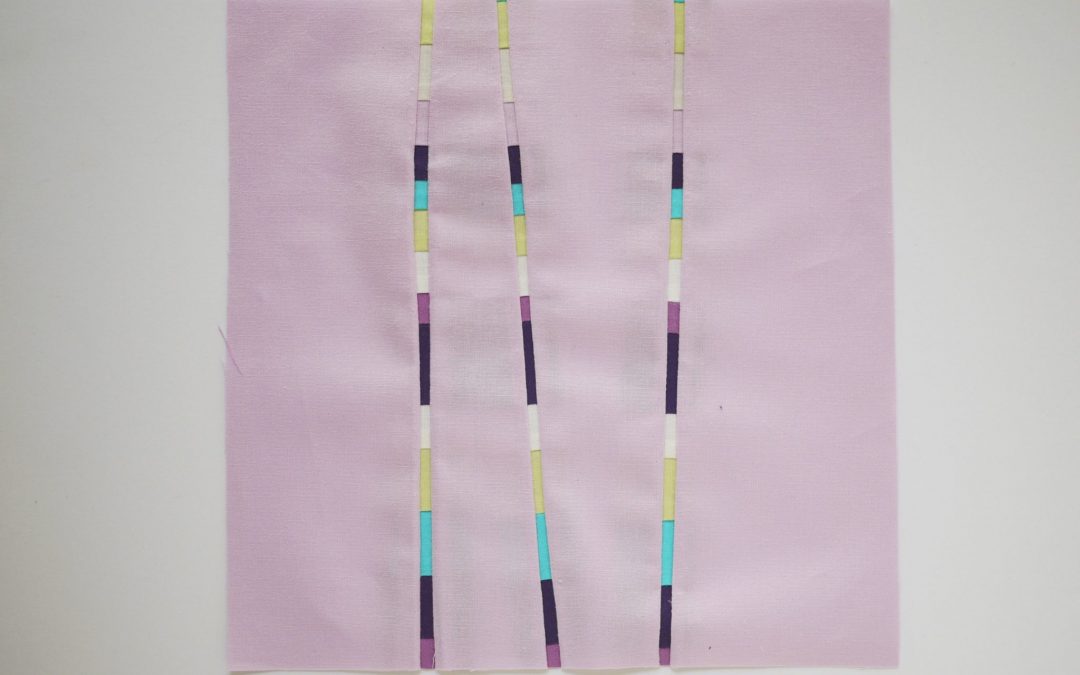
“Inset seaming is a technique I’ve adapted and applied to quilting but it originates from a couture sewing technique used to place delicate thin strips of fragile lace/ other delicate fabrics into garments such as lingerie and special occasion wear. Inset seaming in quilting allows you to place very thin strips of fabric into a larger piece of fabric (or pieced quilt top). Once you get comfortable with this technique you can inset fabric strips of 1/8th of an inch wide (sometimes even less as you get better).”
I have my own instructions below that are specific to this quilt, but Stephanie’s tutorial is a great reference if you need another set of instructions to wrap your head around the technique.
Skinny strip slabs and inset seams
Yields 4 blocks, 8 1/2″ x 8 1/2″ unfinished
Fabric requirements
- (4) 10 1/2″ x 9″ background fabric for blocks a single (your choice). This is roughly one fat quarter divided into 4 quarters.
- (16-18) 18″ long strips of the remaining palette colours in solid fabrics, ranging from 3/4″ to 1 1/2″ in width
- Spray starch (optional)
- Disappearing fabric marker (optional)
- Seam ripper, a key tool for inset seaming!
- Washable glue stick
- Zipper foot
- Standard straight stitch foot
Making Skinny Strip Slabs


Cut the Inset Fabric

Inset Seaming


Have fun with these! Tag me @3rdStoryWorkshop if you post your blocks on Instagram!
this is a very cool technique! I think your quilt will be wonderful!
Thanks so much, Jane! I think it will be fun.
I love the idea of this technique. I’ve seen it done without the basting step, but I believe this will help keep the square from it’s tendency to get wonky. I have so many left over solids from jelly rolls that I have kept because I hate to throw them away. This is a perfect idea for using them up.
It’s so satisfying to take out the basting seam and voilà, the little skinny strip peeps through!
Hi, I can’t see your pictures on this post. Would you please re-link them?
Hi Jennifer! I’ve finally fixed the issue. Hope you can give the technique a try!