
I hate wasting fabric. It’s probably a function of my upbringing. The traditional way of making flying geese is pretty wasteful. And there is a better way. It’s well-known, but I wanted to provide my own tutorial anyway. Time-saving techniques such as chain piecing and cutting multiples make these go faster.
I have made hundreds in the last few weeks. For this tutorial, I used a single V&Co Ombre fabric in Lagoon. I wanted to achieve a gradient effect for my Color Flocks design without using 30 different solid colours. It calls for 1 1/2″ x 3″ geese; this mini 20″ x 20″ has a total of 53 geese.
The following cutting chart shows what you need to make 4 geese at once. The photos in this tutorial shows 2 sets made at once, for a total of 8 geese. The triangles or “geese” are coloured, and the background or “sky” is white.
| FLYING GEESE FINISHED SIZE |
SKY 4 SMALL SQUARES |
GOOSE 1 LARGE SQUARE |
| 1/2” x 1” | 1 5/8” x 1 5/8” | 2 1/2” x 2 1/2” |
| 3/4” x 1 1/2” | 1 7/8” x 1 7/8” | 3” x 3” |
| 1” x 2” | 2 1/8” x 2 1/8” | 3 1/2” x 3 1/2” |
| 1 1/2” x 3” | 2 5/8” x 2 5/8” | 4 1/2” x 4 1/2” |
| 2” x 4” | 3 1/8” x 3 1/8” | 5 1/2” x 5 1/2” |
| 2 1/2” x 5” | 3 5/8” x 3 5/8” | 6 1/2” x 6 1/2” |
| 3” x 6” | 4 1/8” x 4 1/8” | 7 1/2” x 7 1/2” |
| 4” x 8” | 5 1/8” x 5 1/8” | 9 1/2” x 9 1/2” |
| 5” x 10” | 6 1/8” x 6 1/8” | 11 1/2” x 11 1/2” |
| 6” x 12” | 7 1/8” x 7 1/8” | 13 1/2” x 13 1/2” |
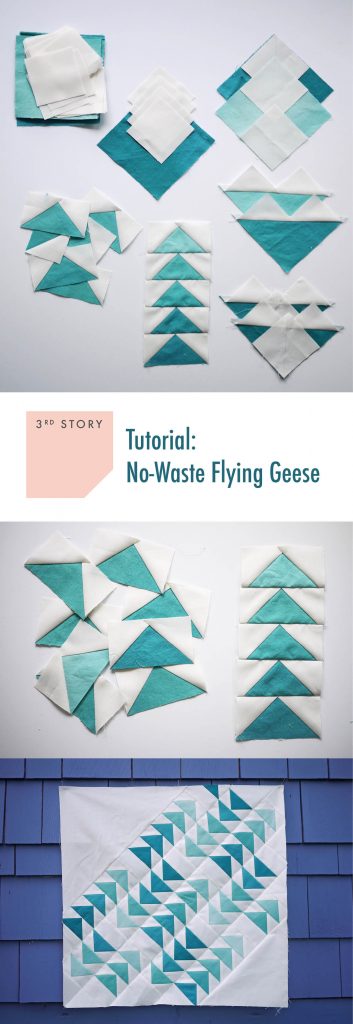
NO-WASTE FLYING GEESE
Yields 8 geese, 1 1/2″ x 3″
Fabric requirements:
– (2) 4 1/2″ squares of the goose colour
– (8) 2 5/8″ squares of the sky colour
- Mark the white squares with a diagonal line. I like to use a mechanical pencil; the thin graphite leaves little room for error along your ruler’s edge.
- Align two white squares on opposite corners on the colour fabric.
(Alternatively, align your white squares on the colour fabric, then mark a diagonal). - Sew a scant 1/4″ seam to either side of the line. I chain piece along one side, then turn the whole string around and chain piece the other side before snipping them apart.
- With your rotary cutter, cut along the marked line. (I wish I had picked an ombre fabric that was not so close to the colour of my cutting mat! Considered it a play on the monochromatic theme.)
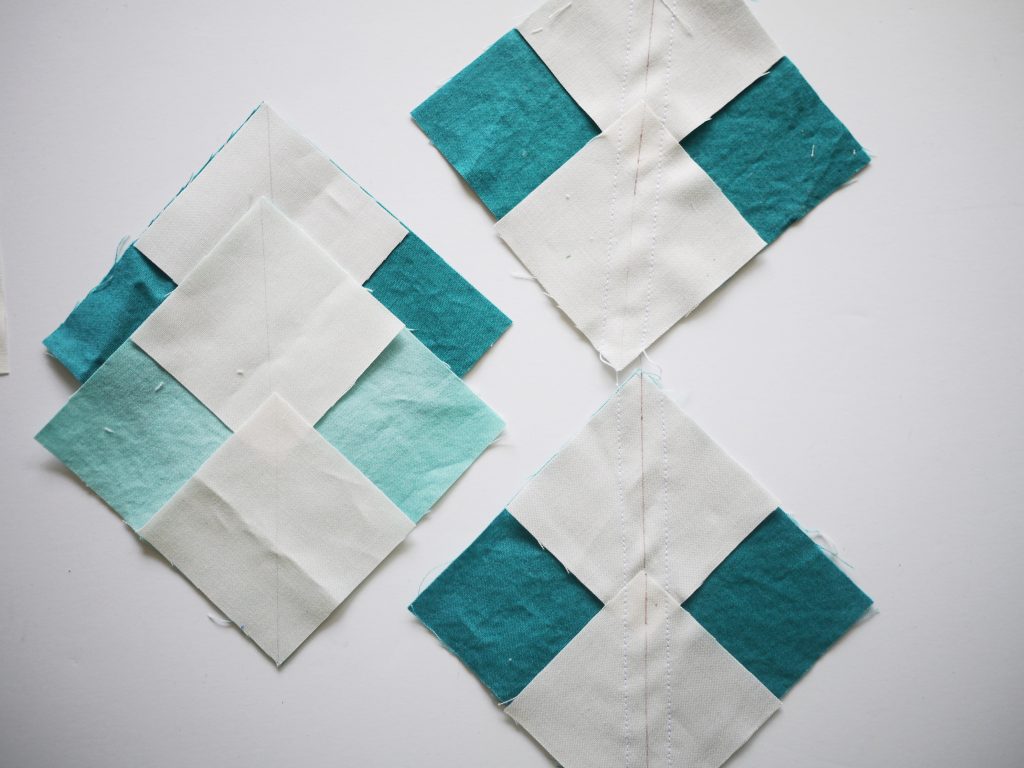
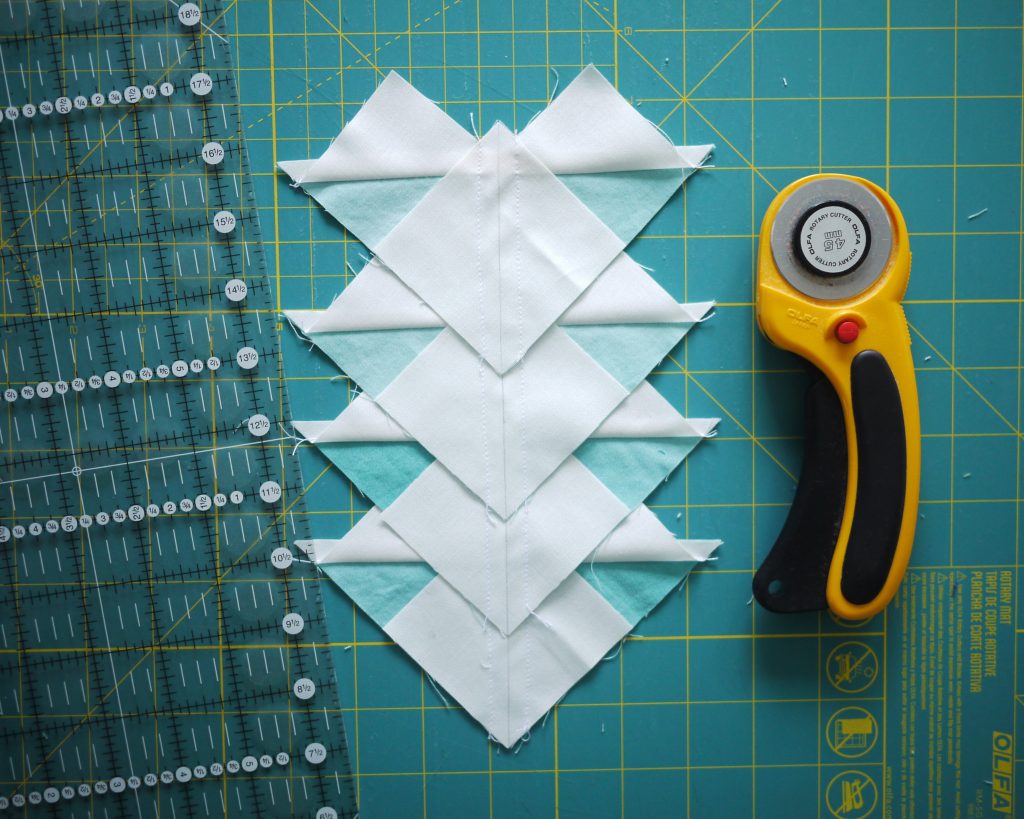
- Press the seams away from the “goose” colour. (Ooo, a heart!)
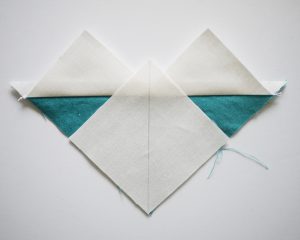
- Align one white square with the colour corner.
- Again, sew a scant 1/4″ seam to either side of the line. Chain piece them for maximum efficiency. Snip the chain apart.
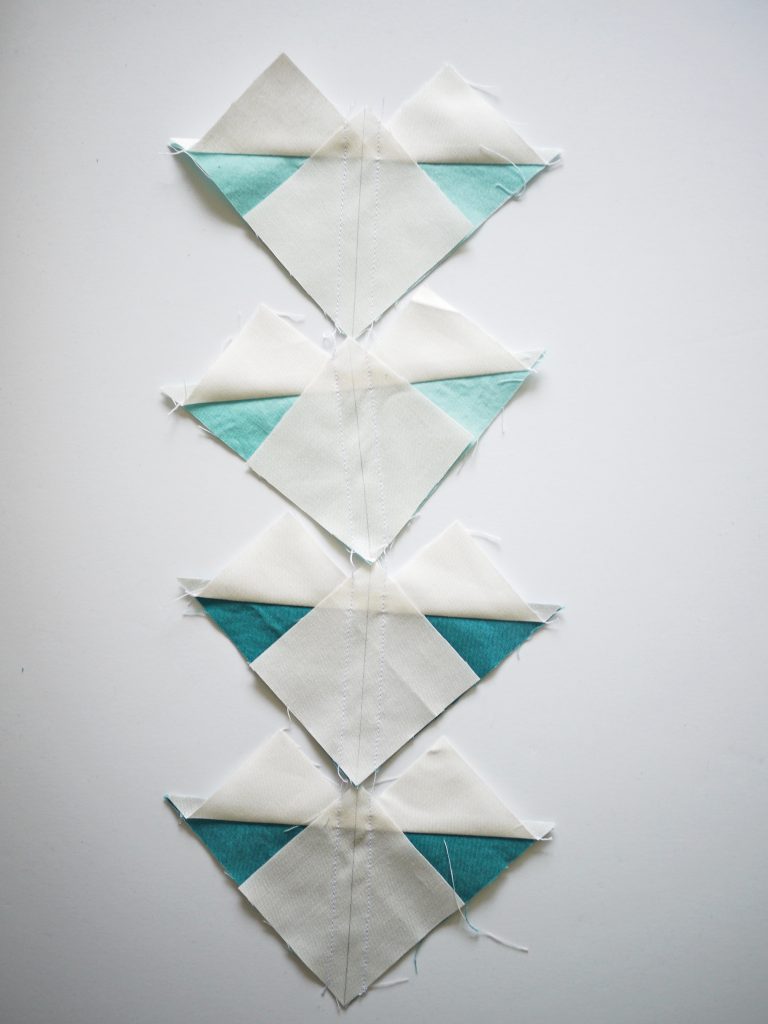
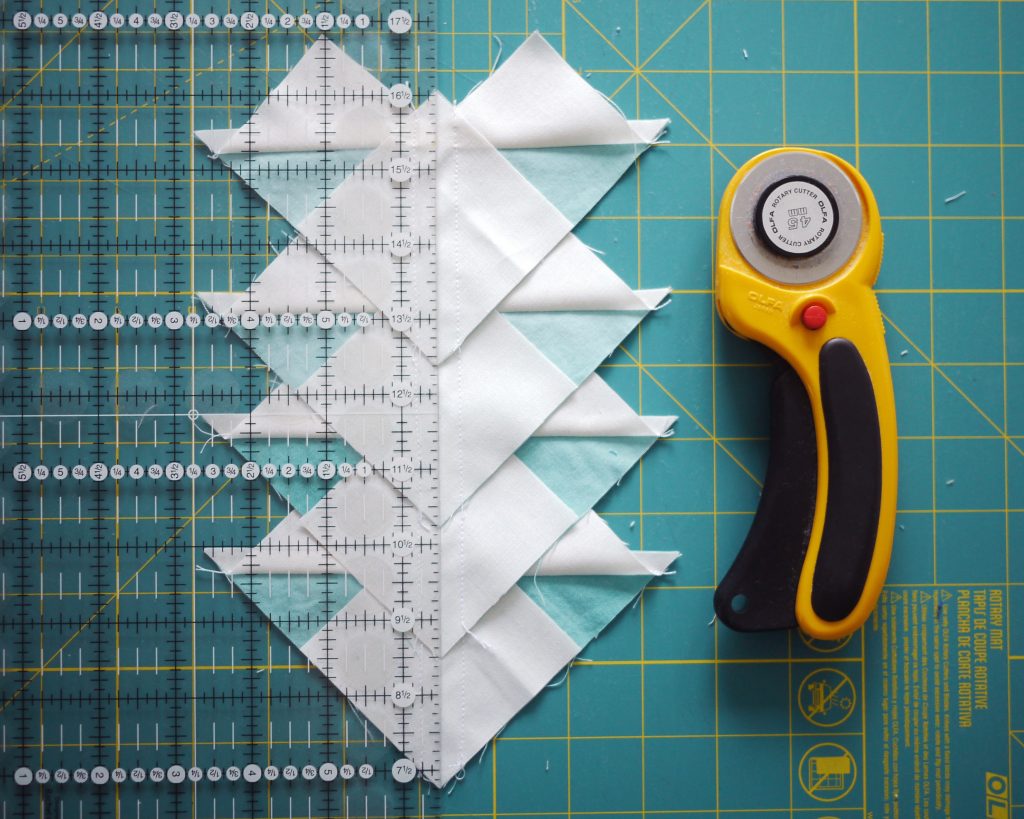
- Stagger a row of four units on your cutting mat. To keep them straight, align the marked line along a gridline on your mat (not pictured!).
- Using a sharp blade, cut along the marked line. In one single cut, you’ve cut all four at once! Be sure to keep strong pressure on the ruler along the whole length of the 4 geese. I do not recommend doing more than four at a time; the accuracy of the cut decreases quite a bit if you go beyond four.
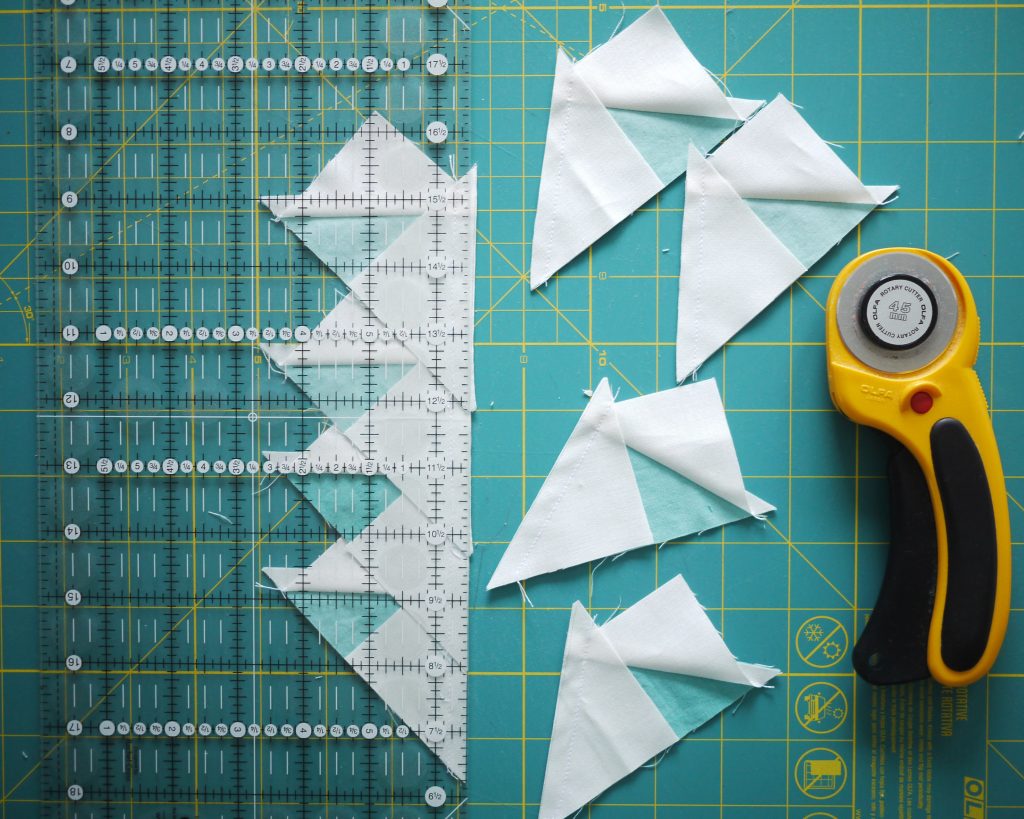
- Press away from the coloured goose.
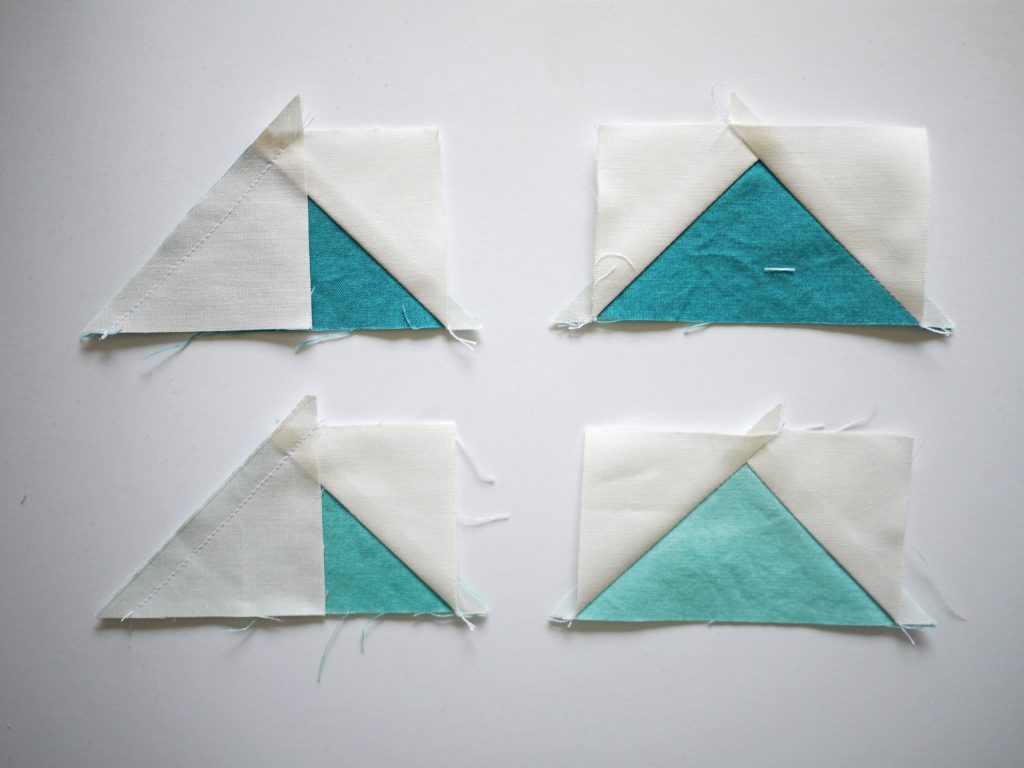
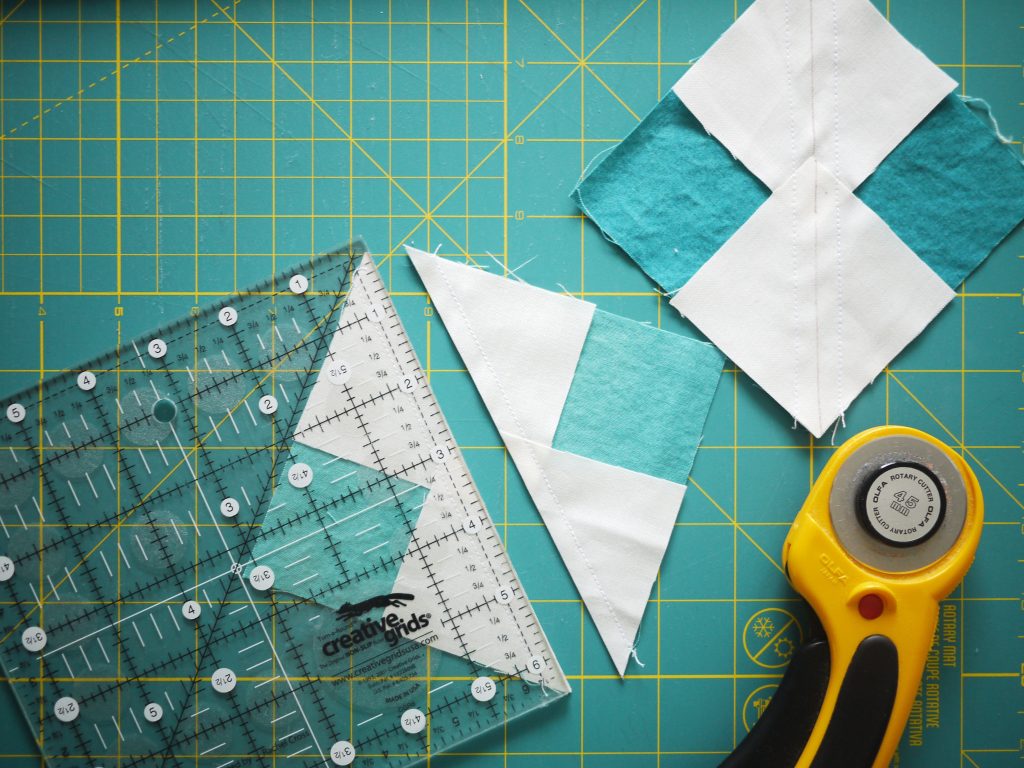
- Square up your geese to the unfinished size; 2″ x 3 1/2″ in this case. I use a Bloc Loc ruler to accomplish a 1/4″ allowance from the goose’s point, but you can use a regular ruler with a marked 1/4″. (Note: I don’t actually have the right sized Bloc Loc, but the point’s 1/4″ seam allowance can be achieved with any Bloc Loc Flying Geese ruler.)
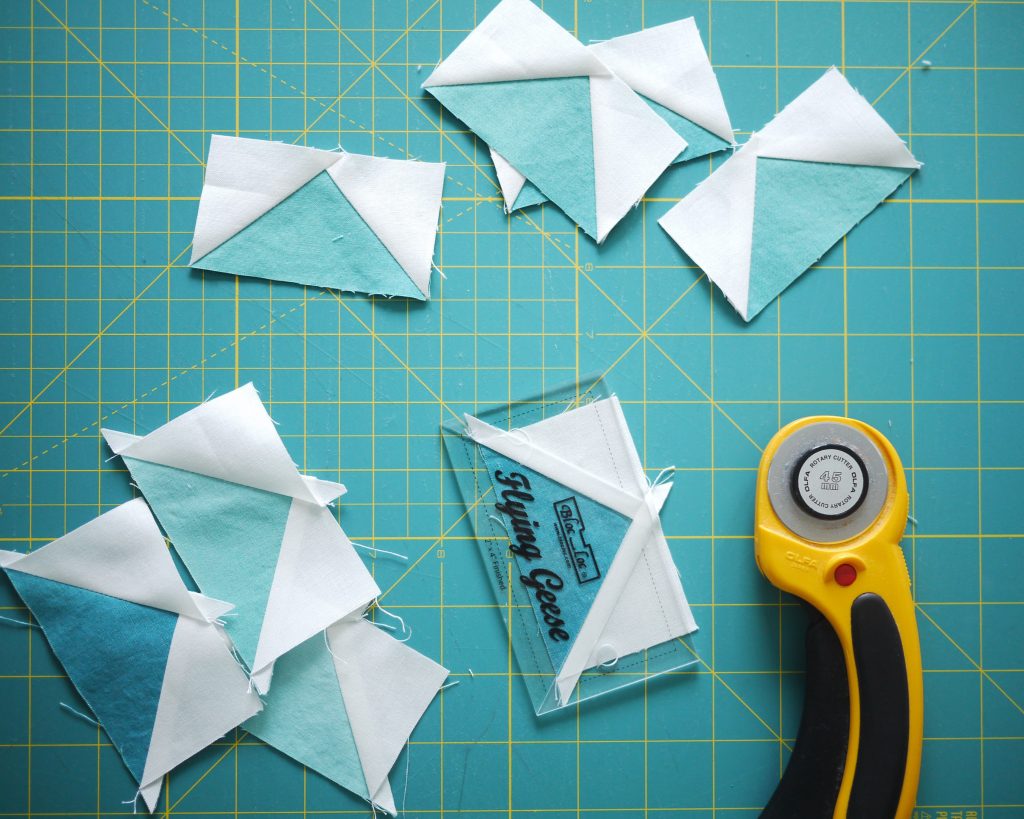
- When using a regular ruler, be sure to align the goose’s point with mid-point of your unfinished size. For a finished width of 3″, my unit is 3 1/2″ unfinished. Therefore, I line up the goose’s point at 1 3/4″ on my ruler.

Geese! Four at a time, no waste, as quick as possible. Since I used the Ombre fabric, I arranged a set of five from darkest to lightest to get the gradient effect. Now go make a Canada Geese Flag with your no-waste skills.
Just when I thought I knew the best way to make flying geese, you win me over with this tutorial. Love. Thanks for sharing with the ombre geese. xo
Thanks, Kelly! The four at a time method really totally changed my mind about flying geese.
Great tutorial, thanks! I want to try this method. I love working with the ombre fabric too. The geese gradient is fantastic!
Thanks, Sandy! The original pattern called for so many different colours of fabric and the ombre was the perfect single fabric solution.
How many flying geese of each size are needed for a twin size quilt?